-
github创建仓库
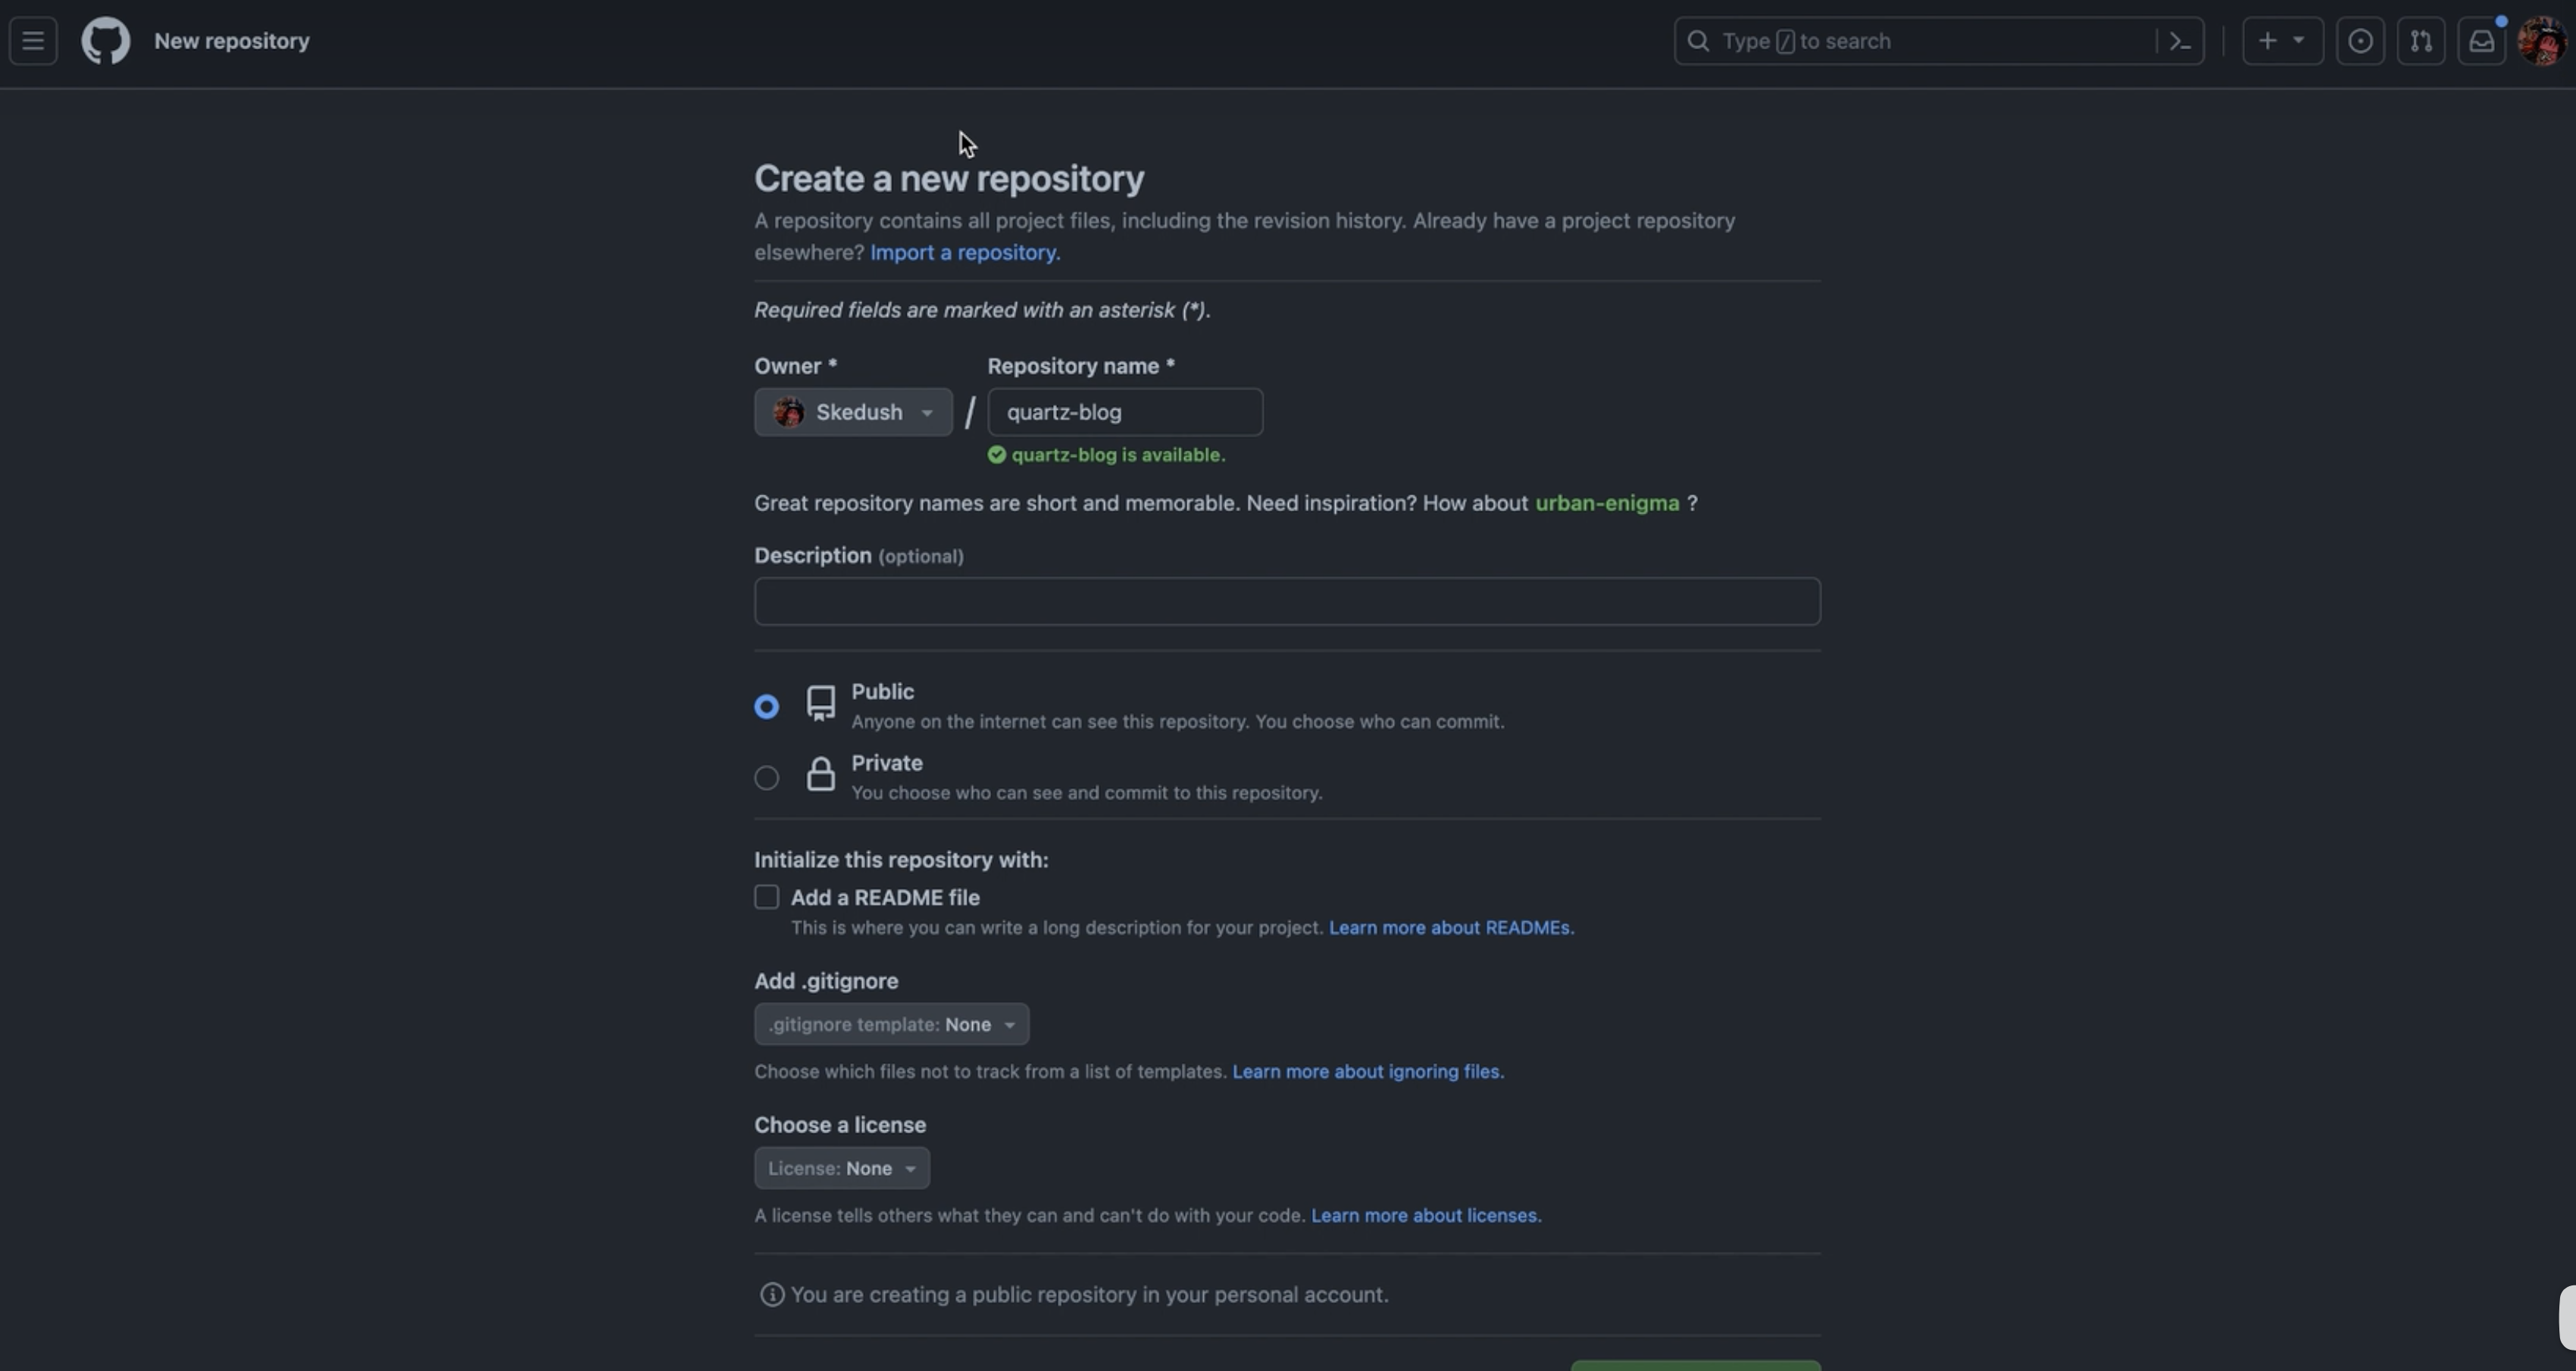 随便创建一个仓库就行
- 接着修改仓库的配置。
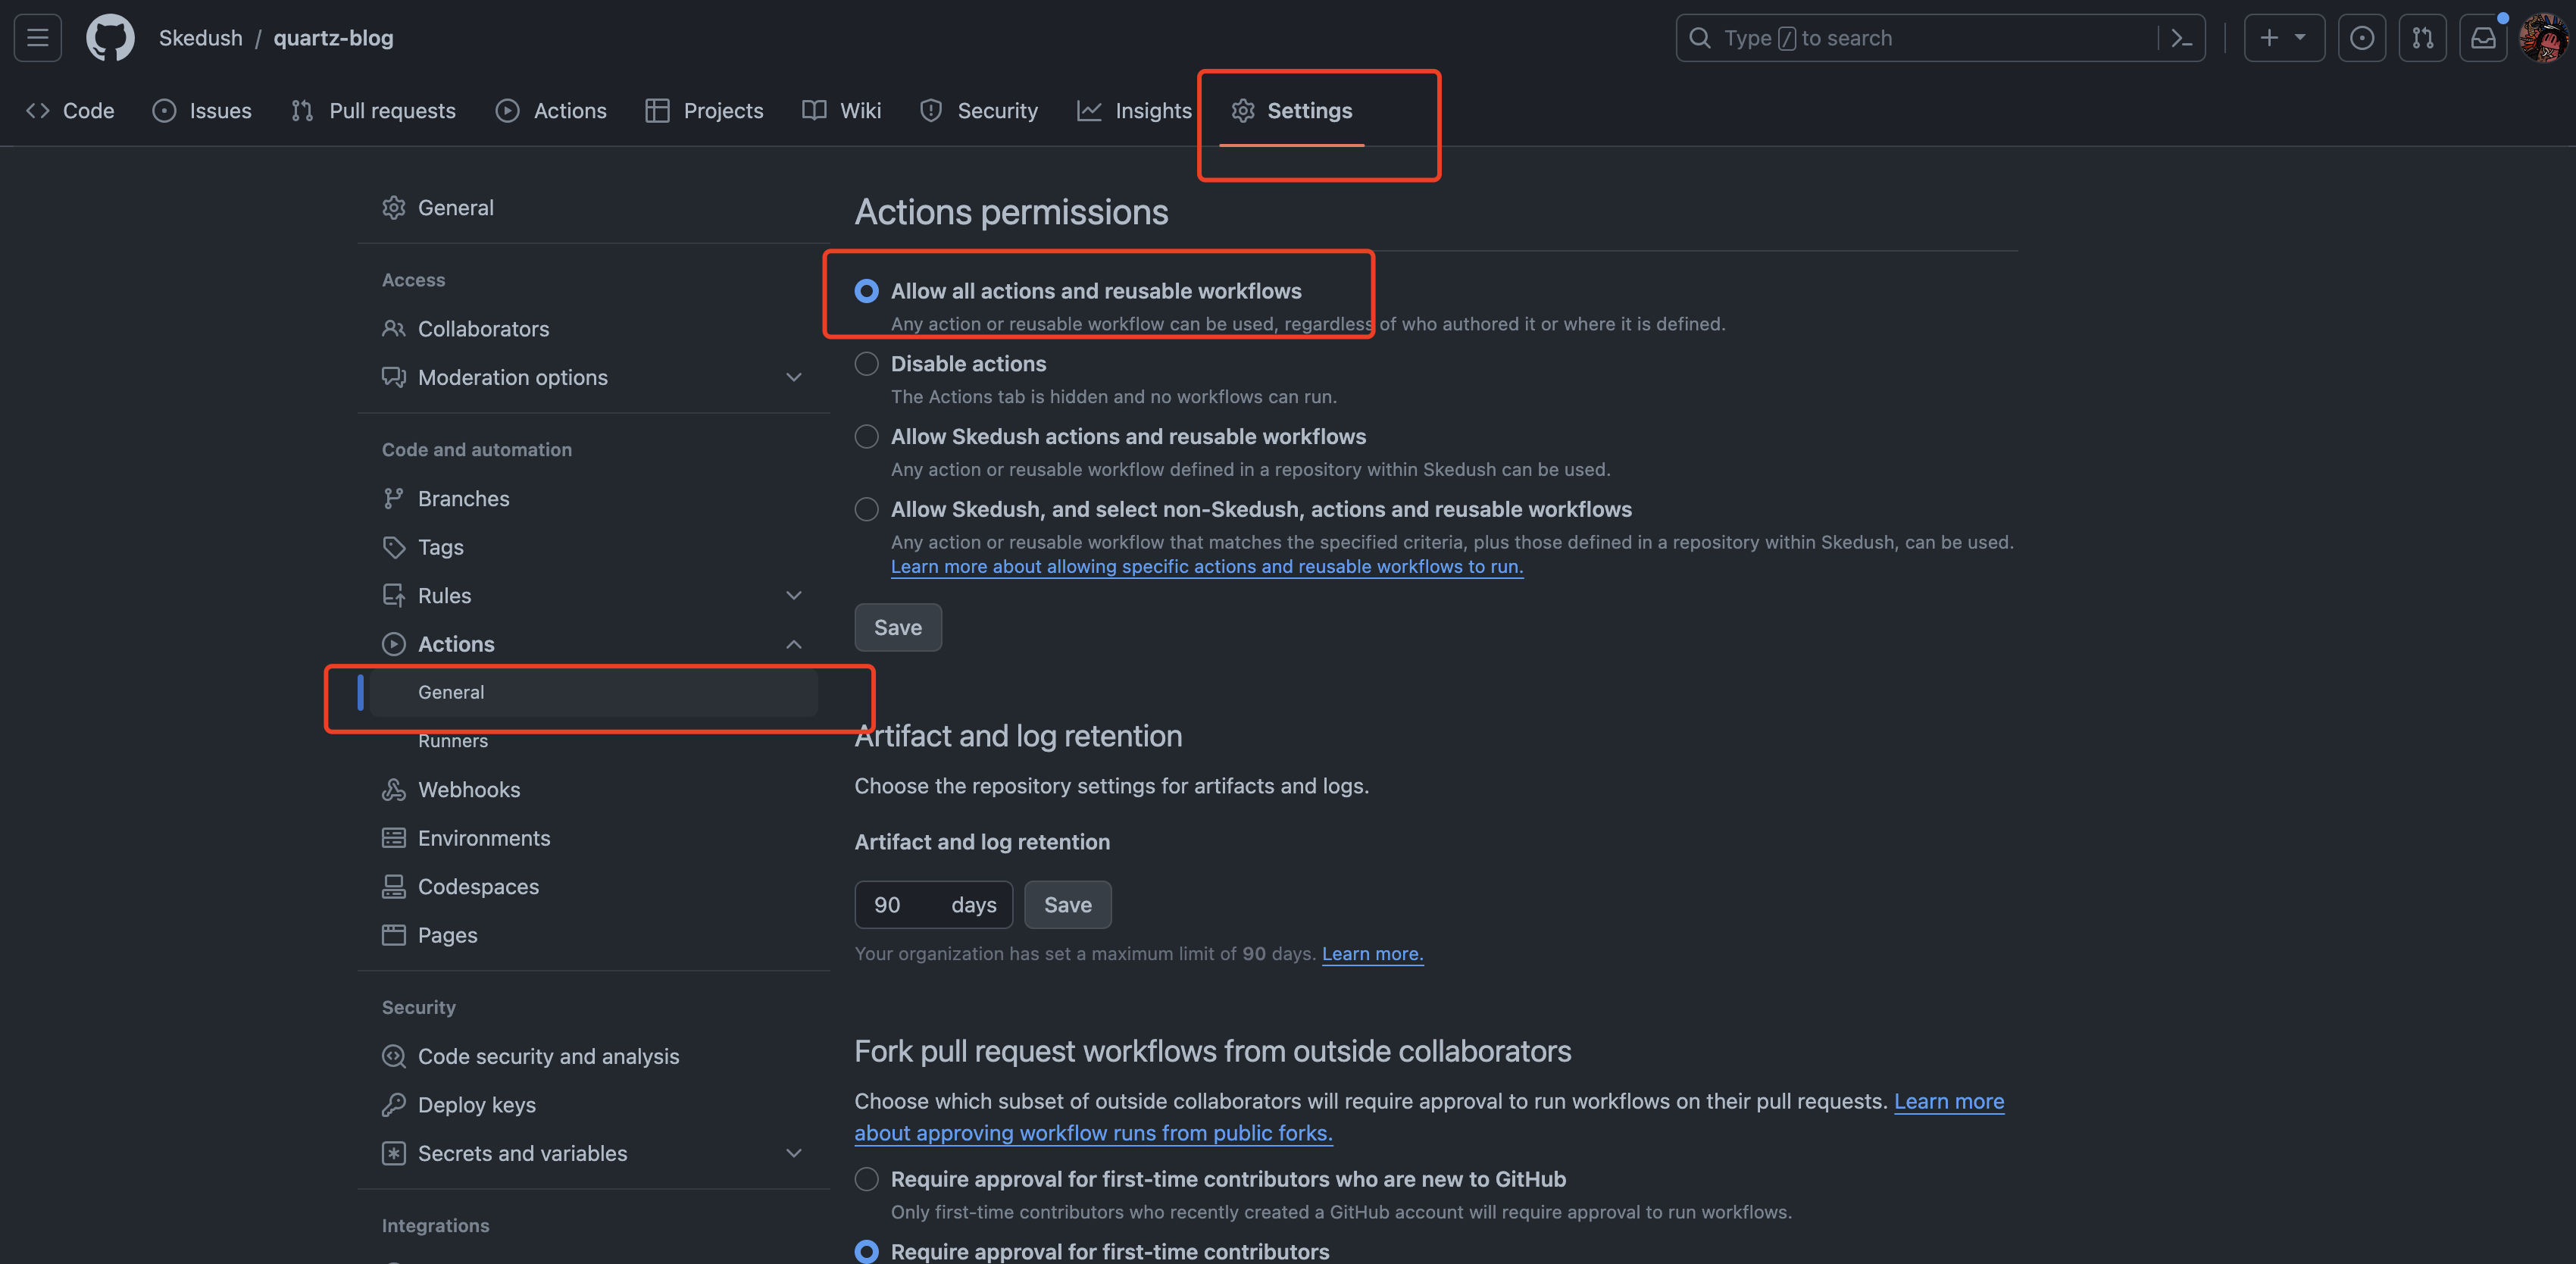
- 接着修改仓库的配置。
-
拉取quartz代码
git clone https://github.com/jackyzha0/quartz.git cd quartz npm i -
安装依赖&运行项目。
- 需要node 18以上版本
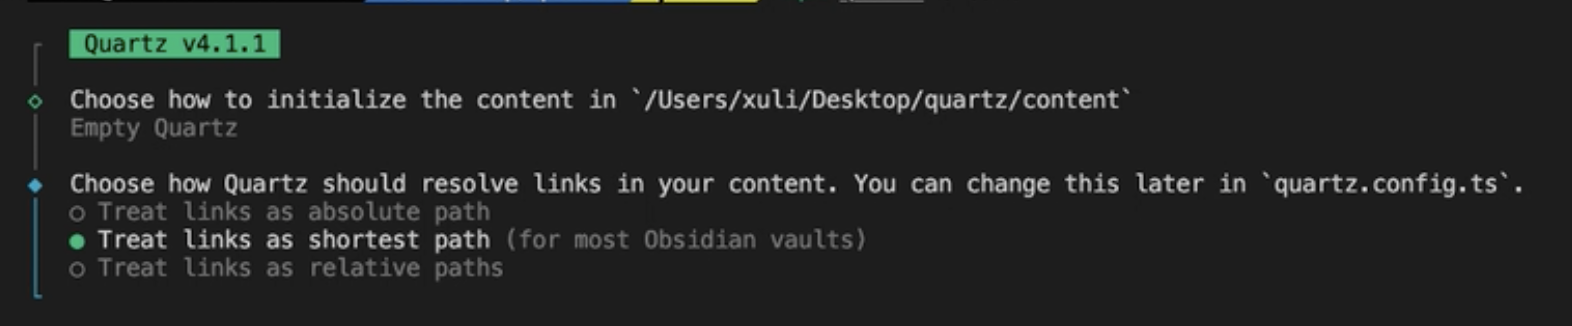
npx quartz create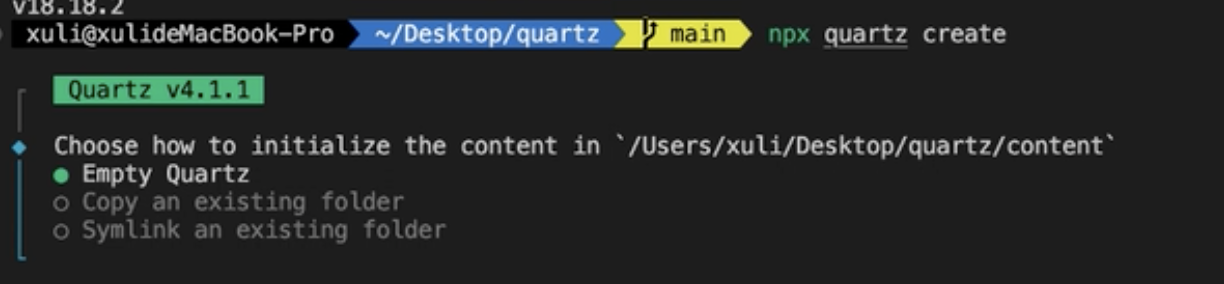
-
编写git actions持续化集成的workflow文件。
- 在根目录下的.github/workflows中创建deploy.yml文件,内容如下:
name: Deploy Quartz site to GitHub Pages on: push: branches: - main permissions: contents: read pages: write id-token: write concurrency: group: "pages" cancel-in-progress: false jobs: build: runs-on: ubuntu-22.04 steps: - uses: actions/checkout@v3 with: fetch-depth: 0 # Fetch all history for git info - uses: actions/setup-node@v3 with: node-version: 18.14 - name: Install Dependencies run: npm ci - name: Build Quartz run: npx quartz build - name: Upload artifact uses: actions/upload-pages-artifact@v2 with: path: public deploy: needs: build environment: name: github-pages url: ${{ steps.deployment.outputs.page_url }} runs-on: ubuntu-latest steps: - name: Deploy to GitHub Pages id: deployment uses: actions/deploy-pages@v2 -
上传到自己的创建的仓库中。
git remote add origin https://github.com/[用户名]/[仓库名].git
git branch -M main
git push -u origin main
成功后再github的项目中的ancions里面应该就能看到
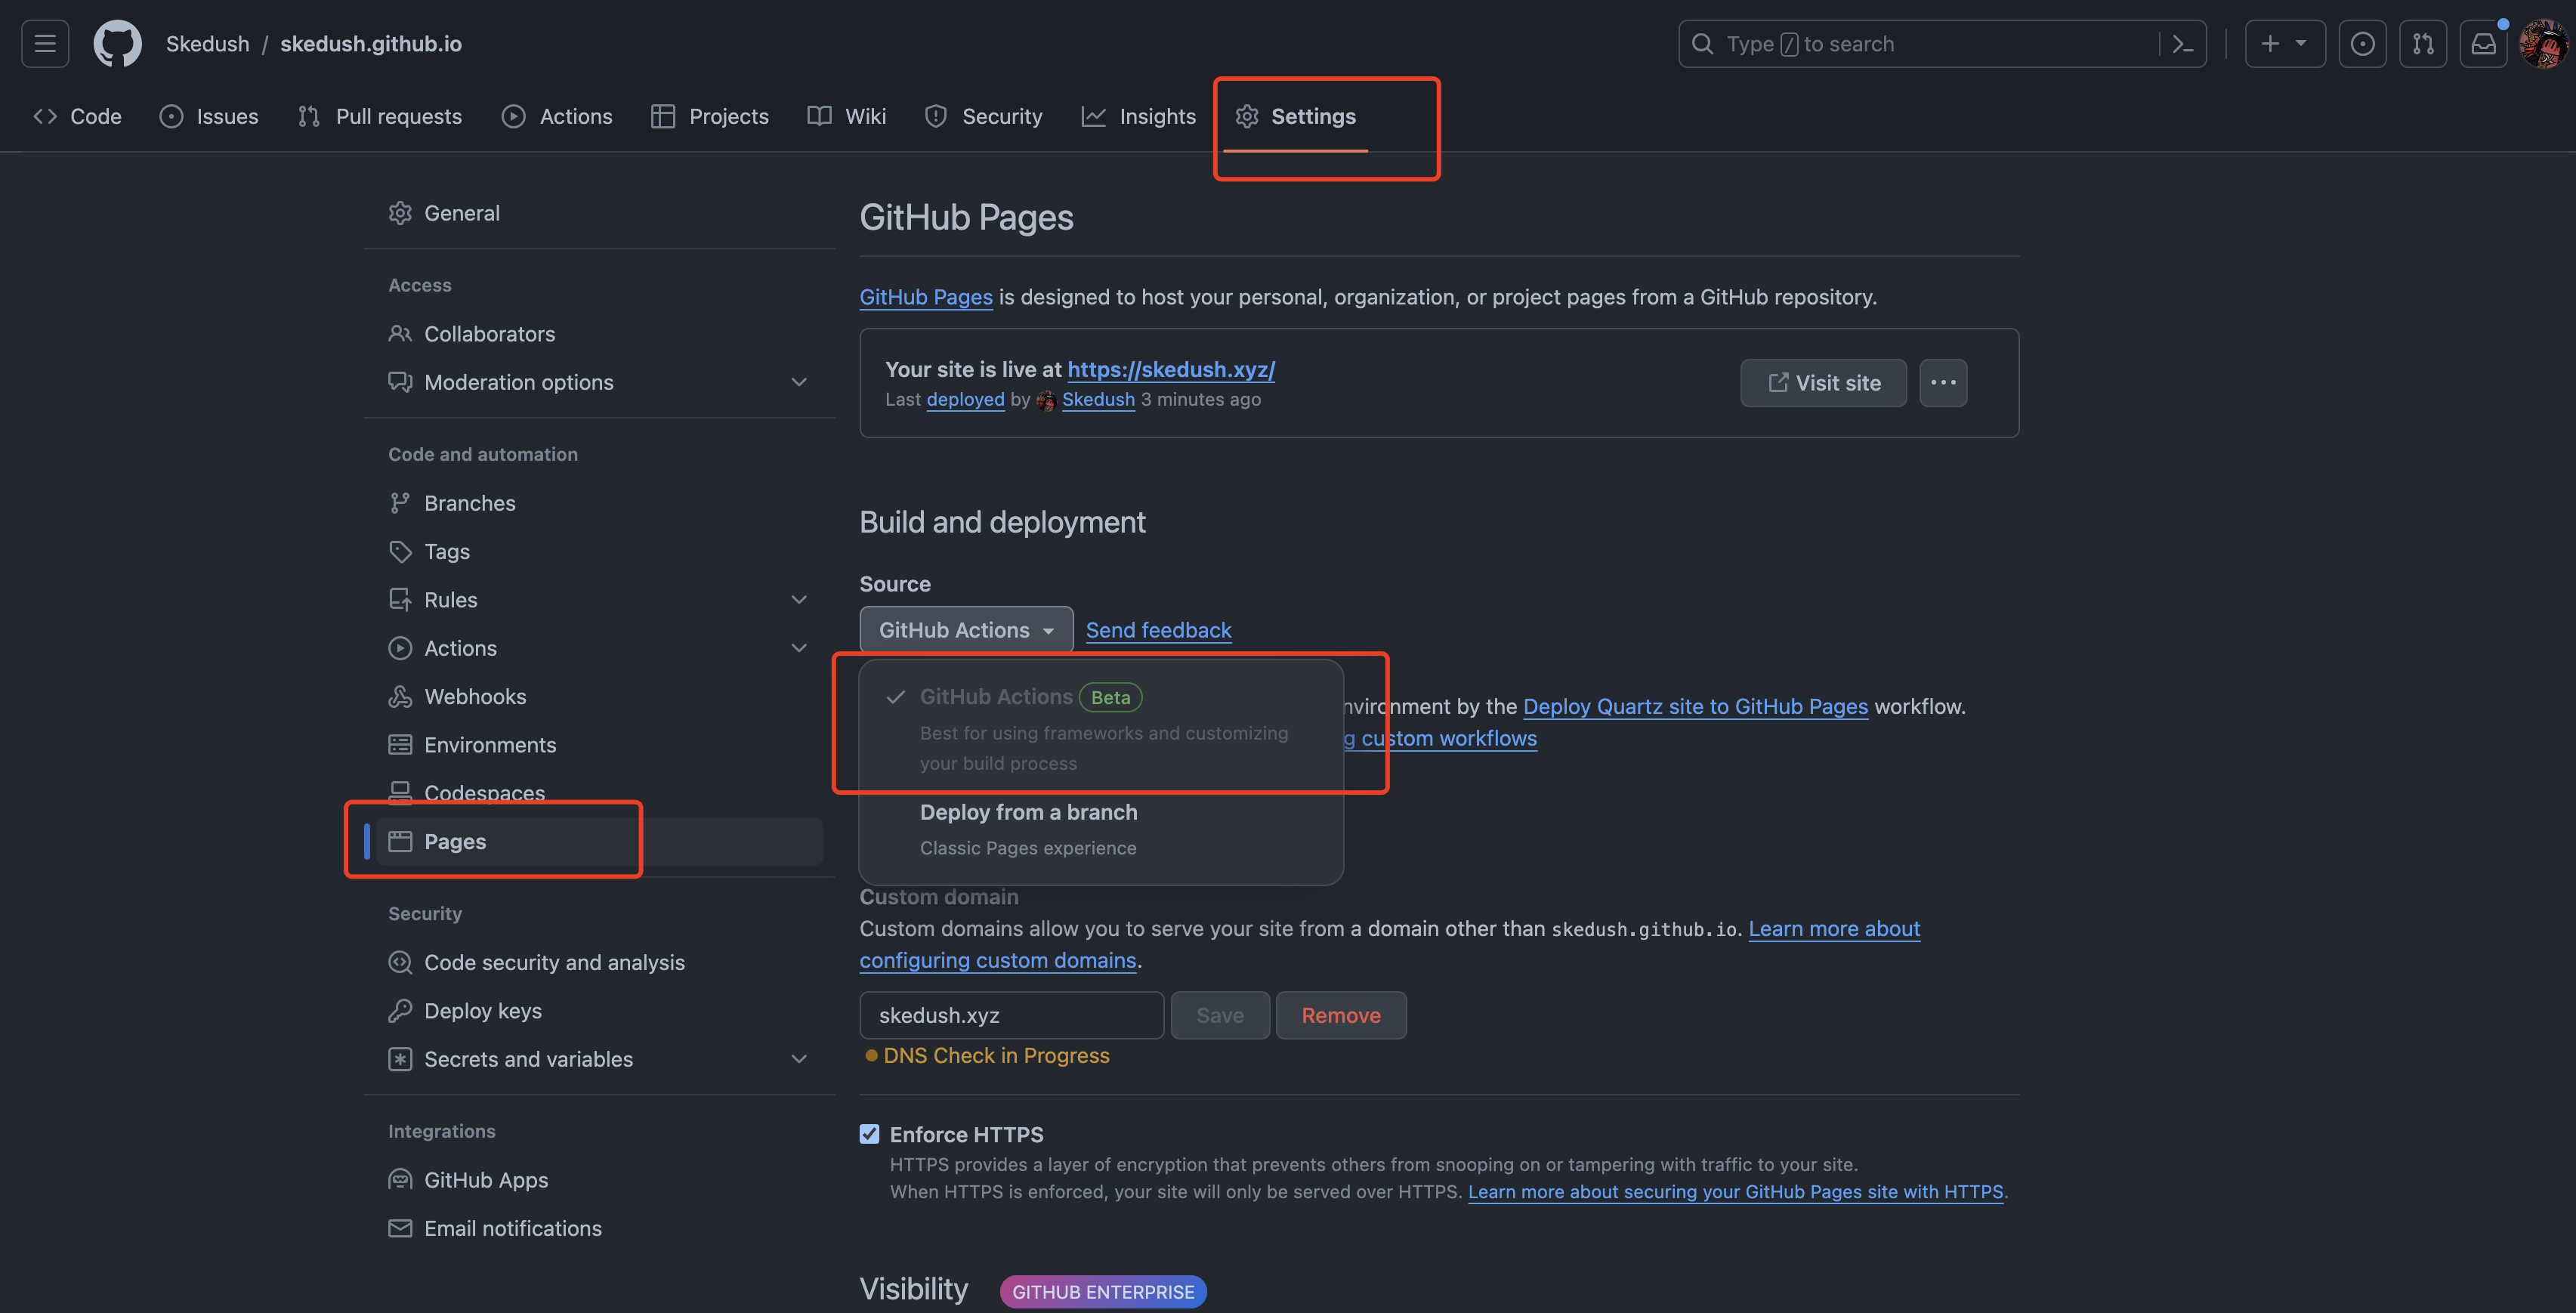
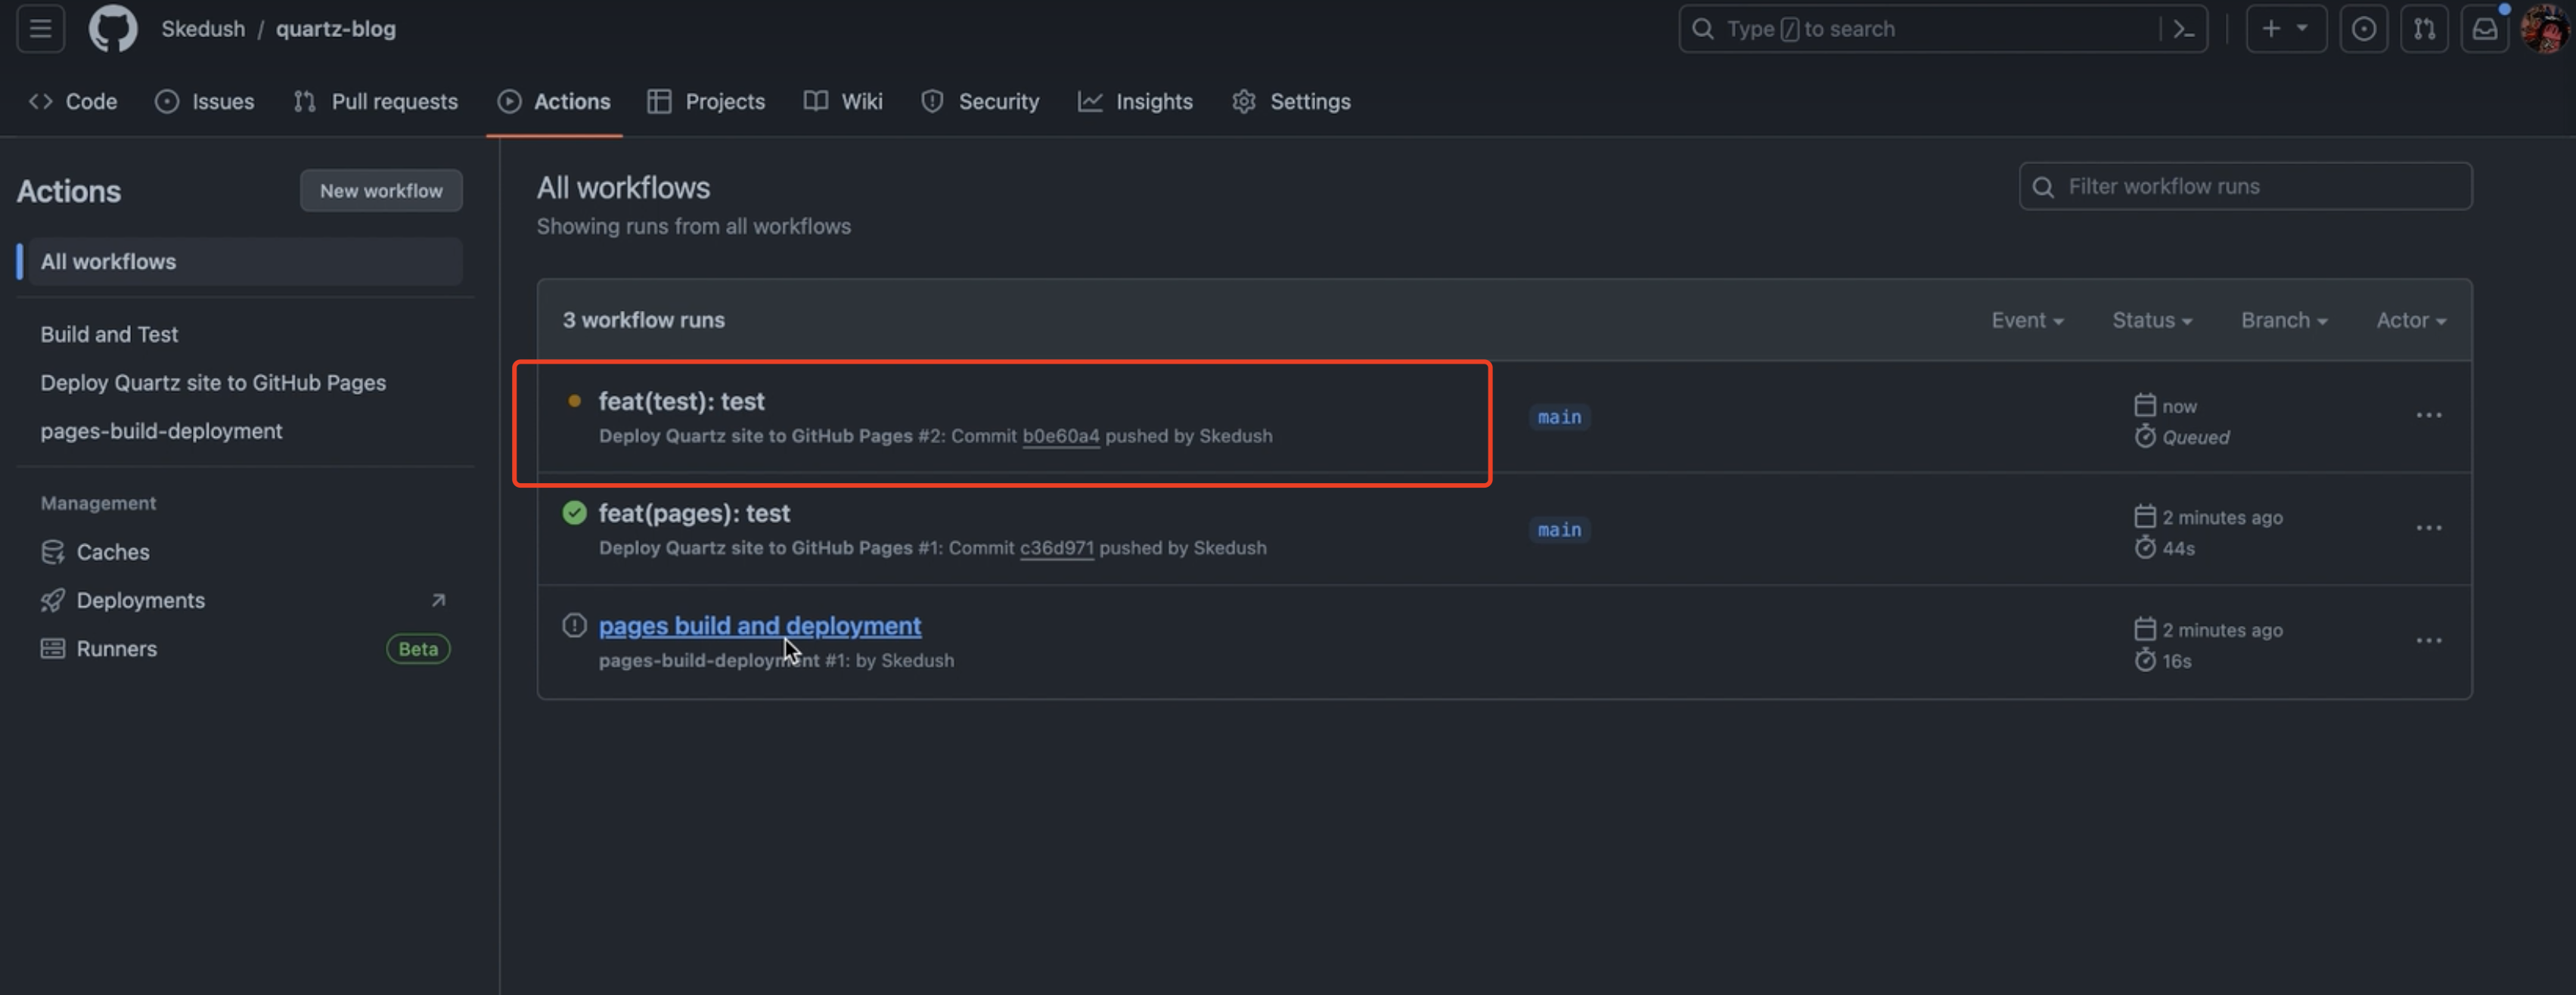 集成完成后打开https://skedush.github.io/\[仓库名\]就能看到自己部署的博客啦!
 -
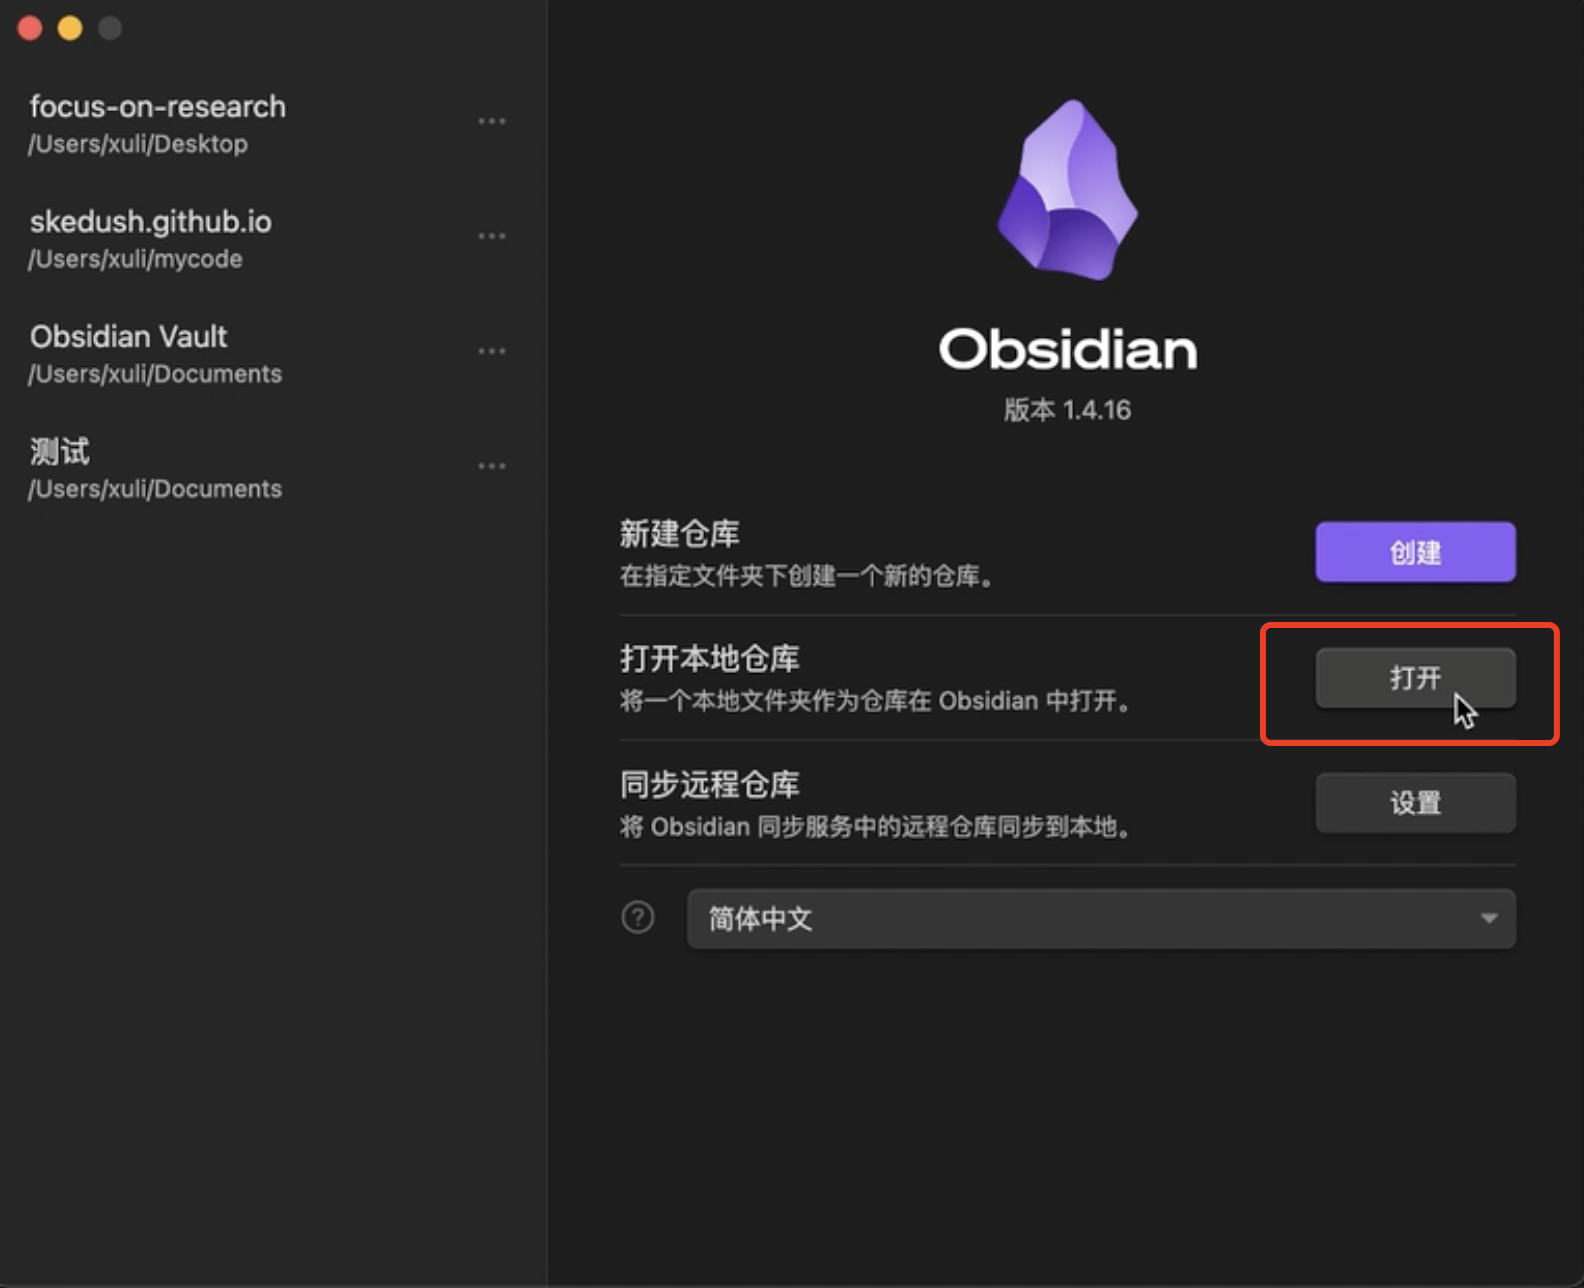
使用obsidian打开项目并安装同步等插件
-
选择本地仓库文件夹打开
-
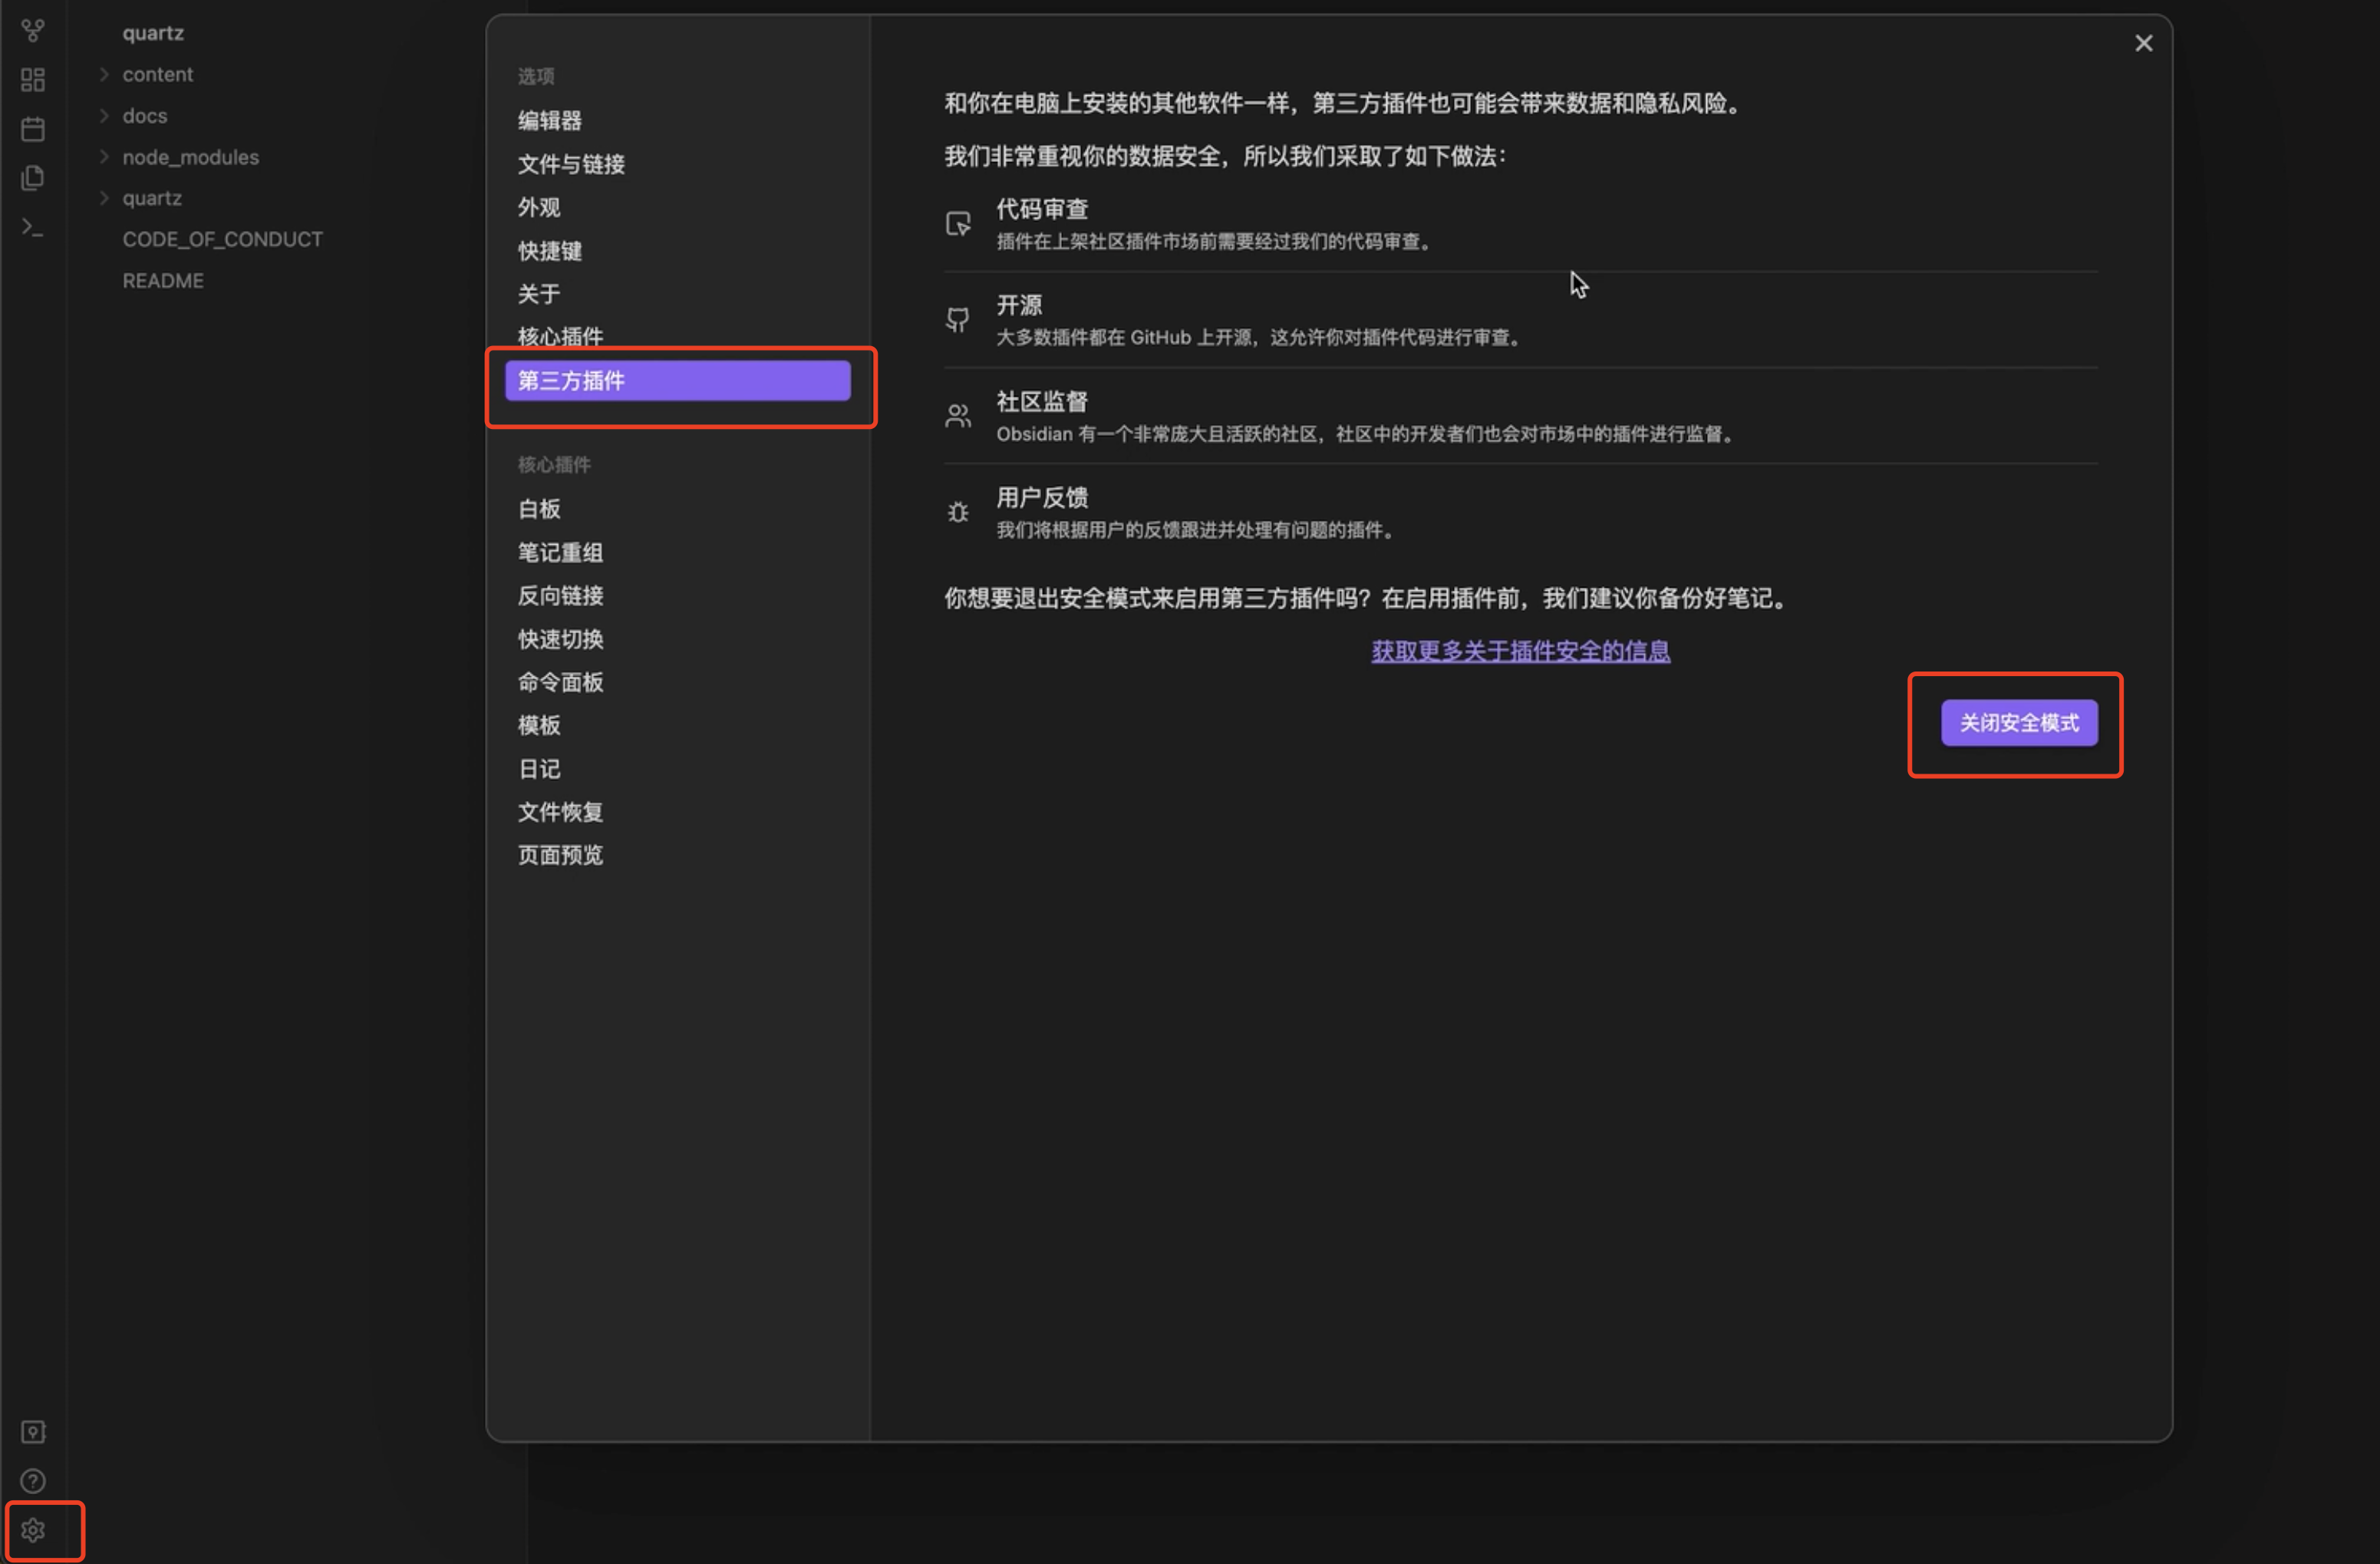
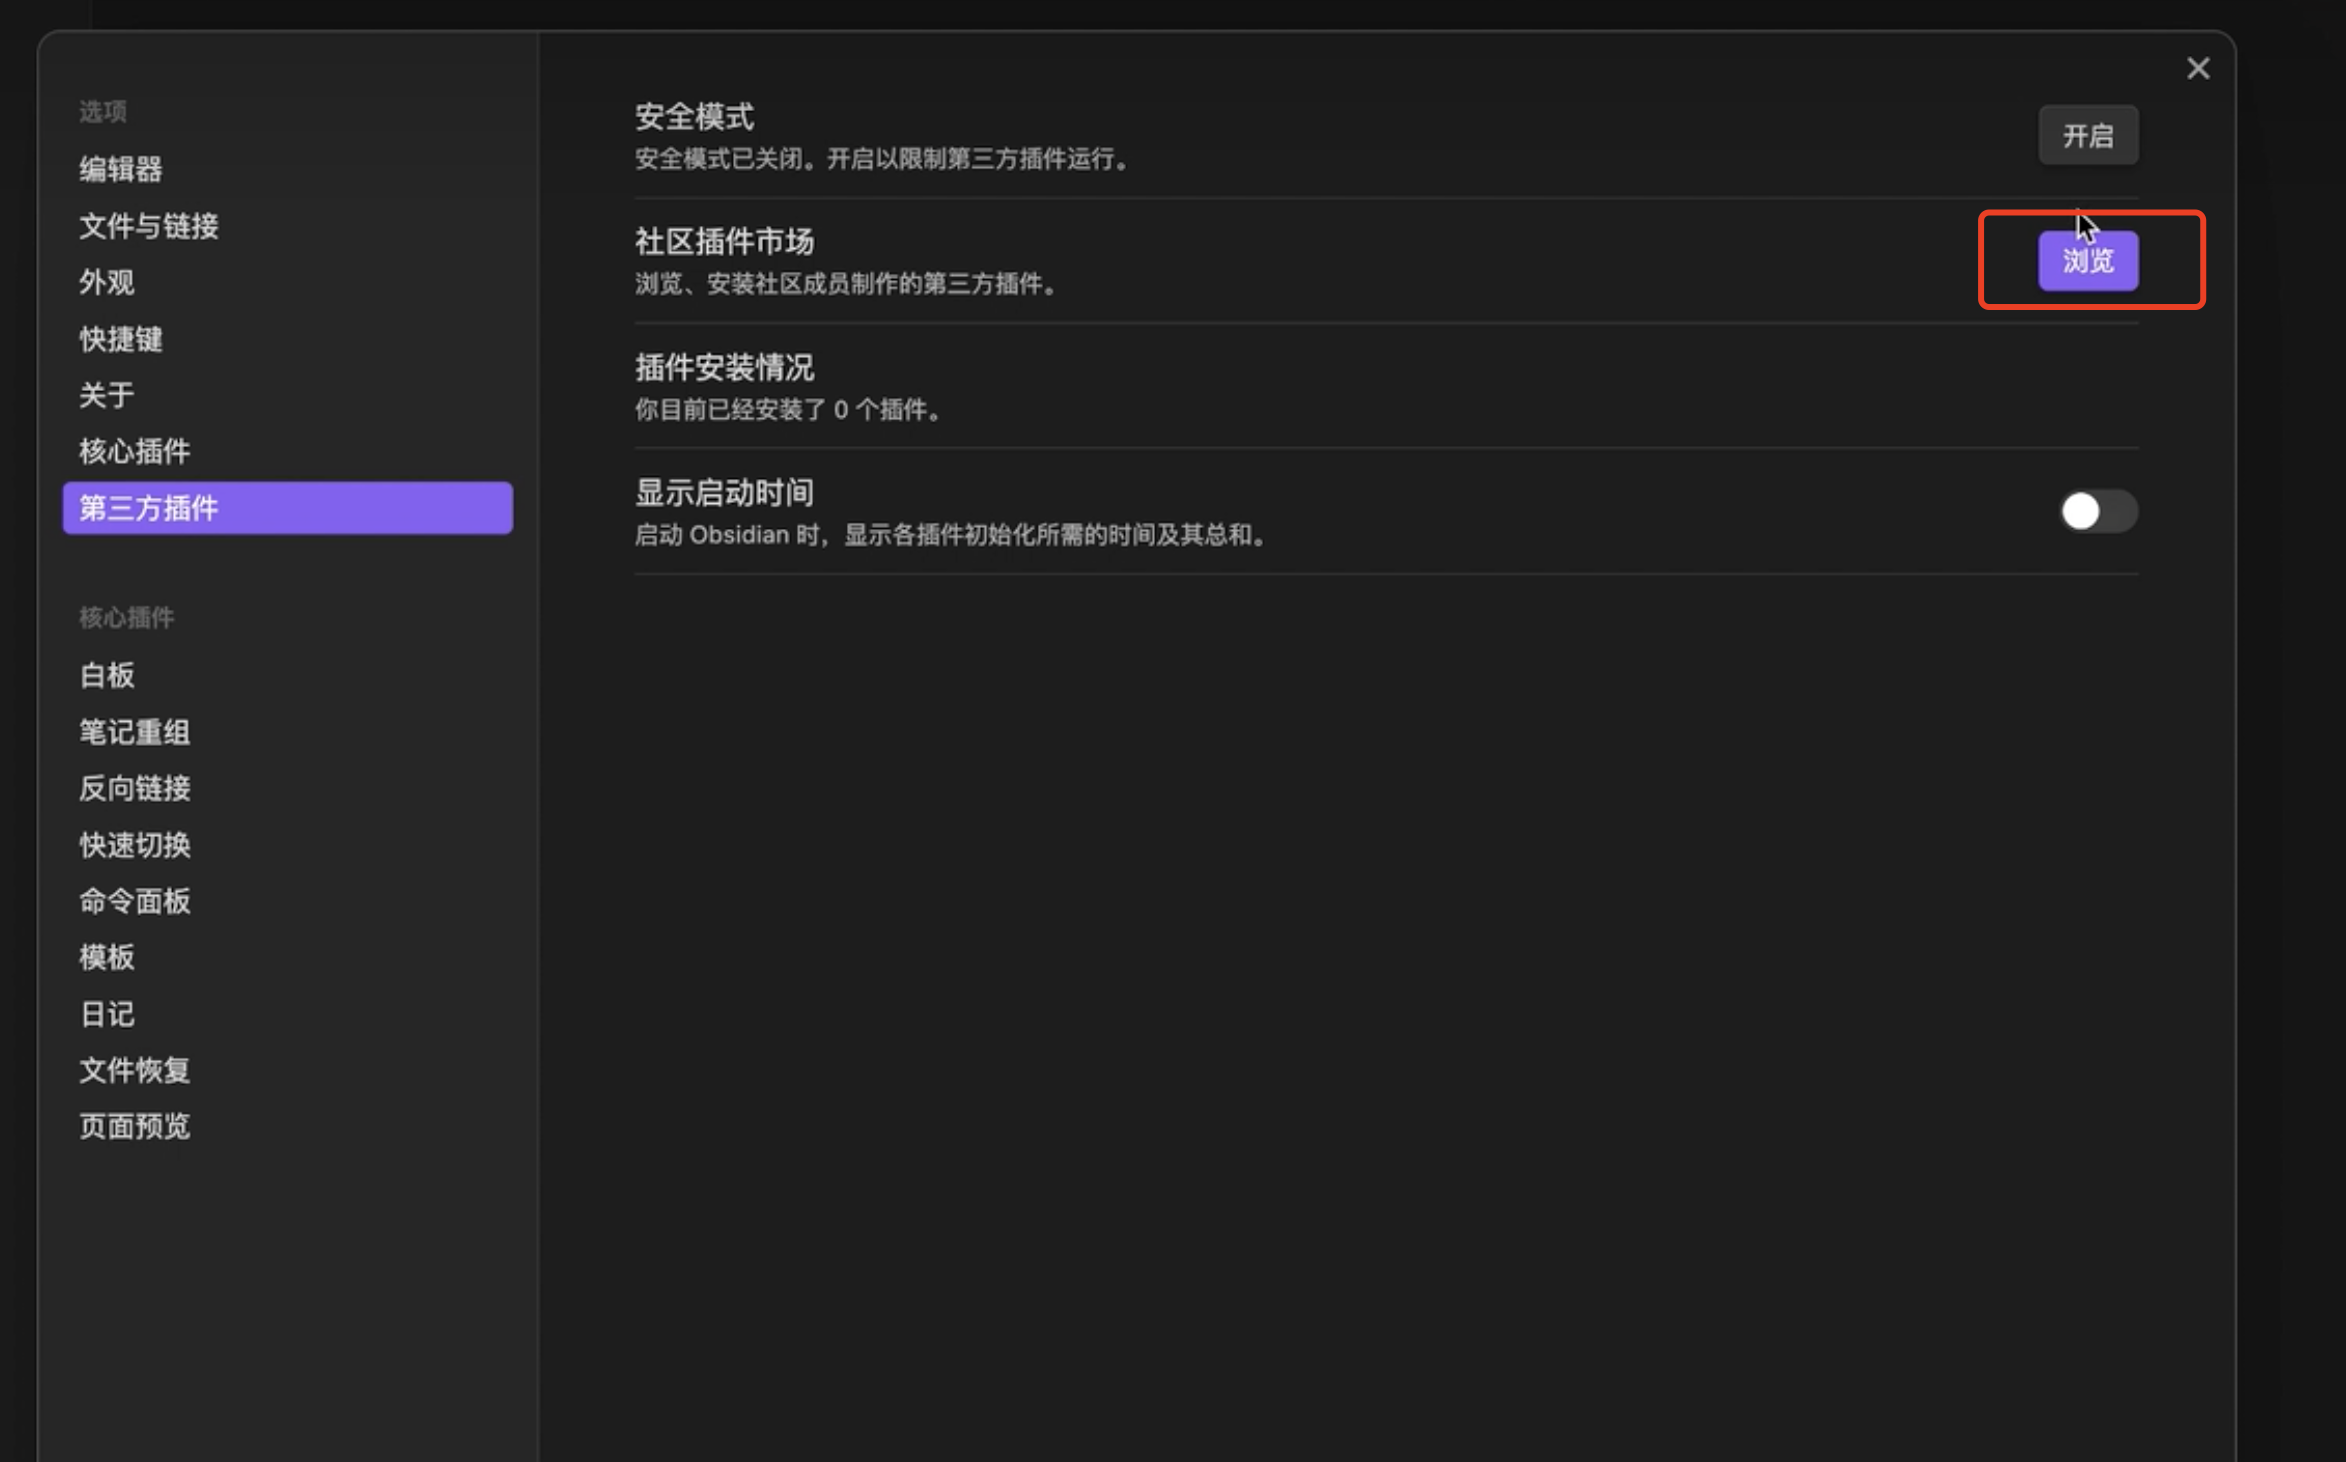
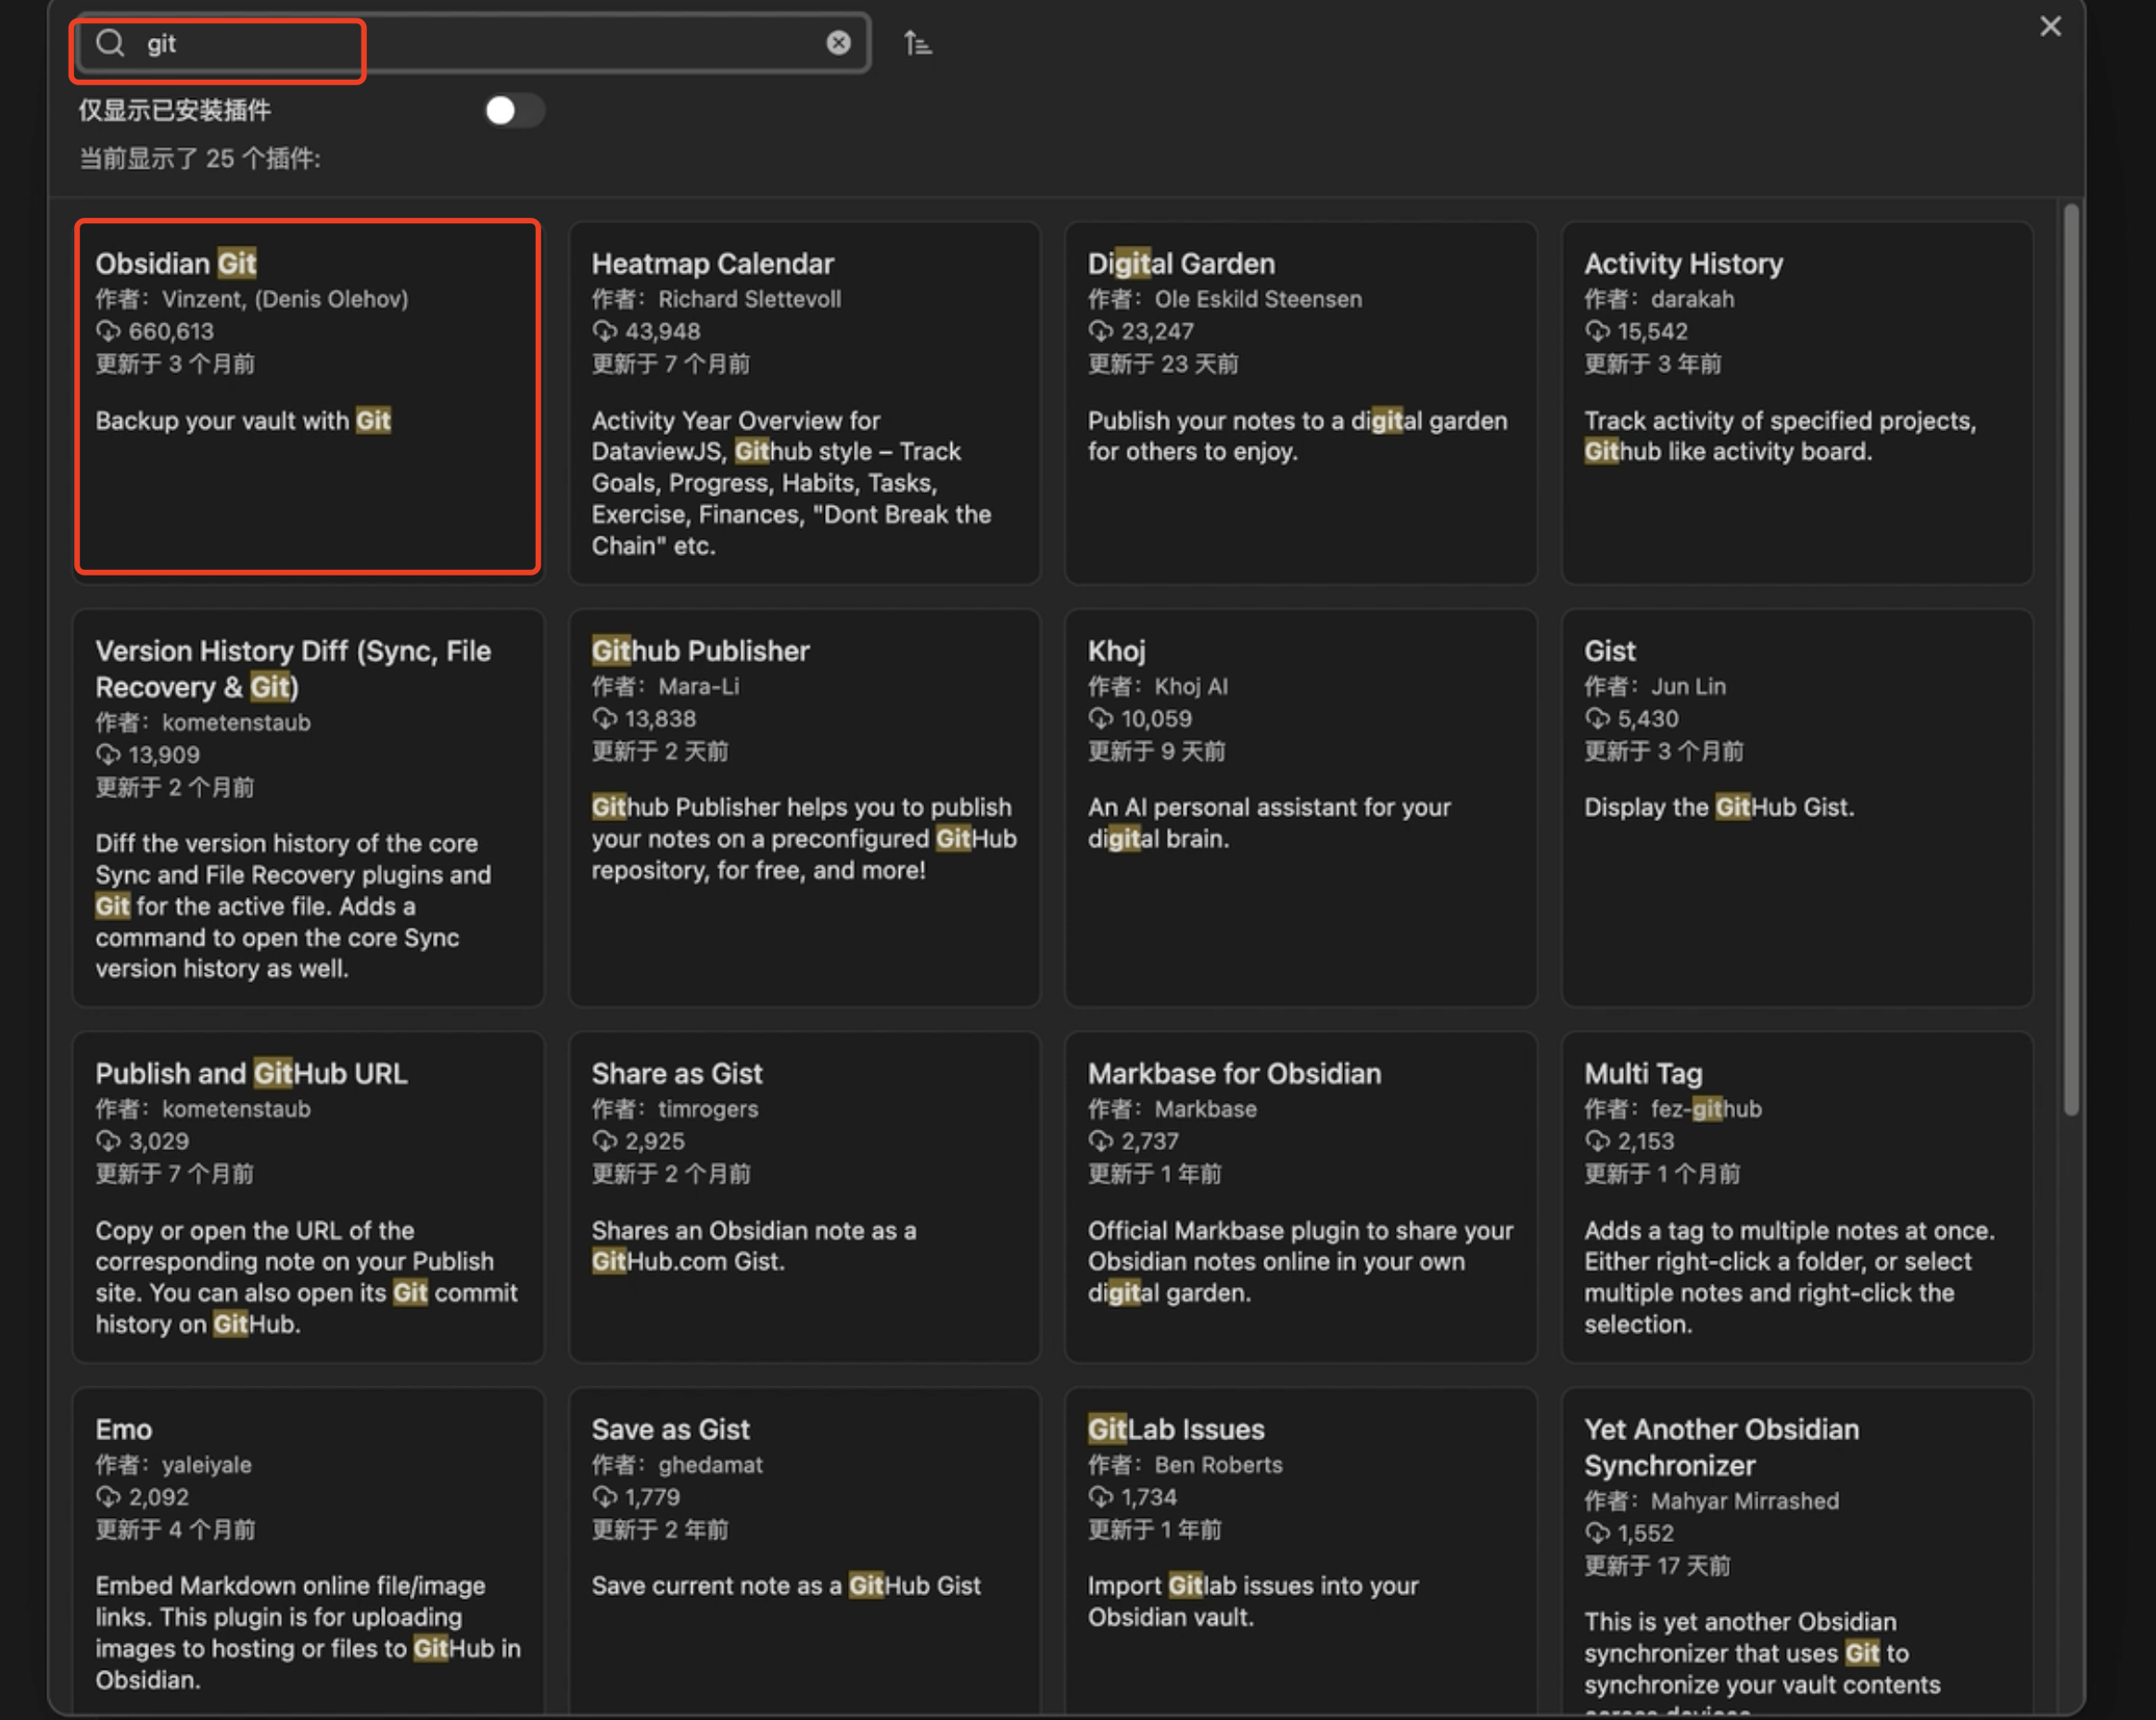
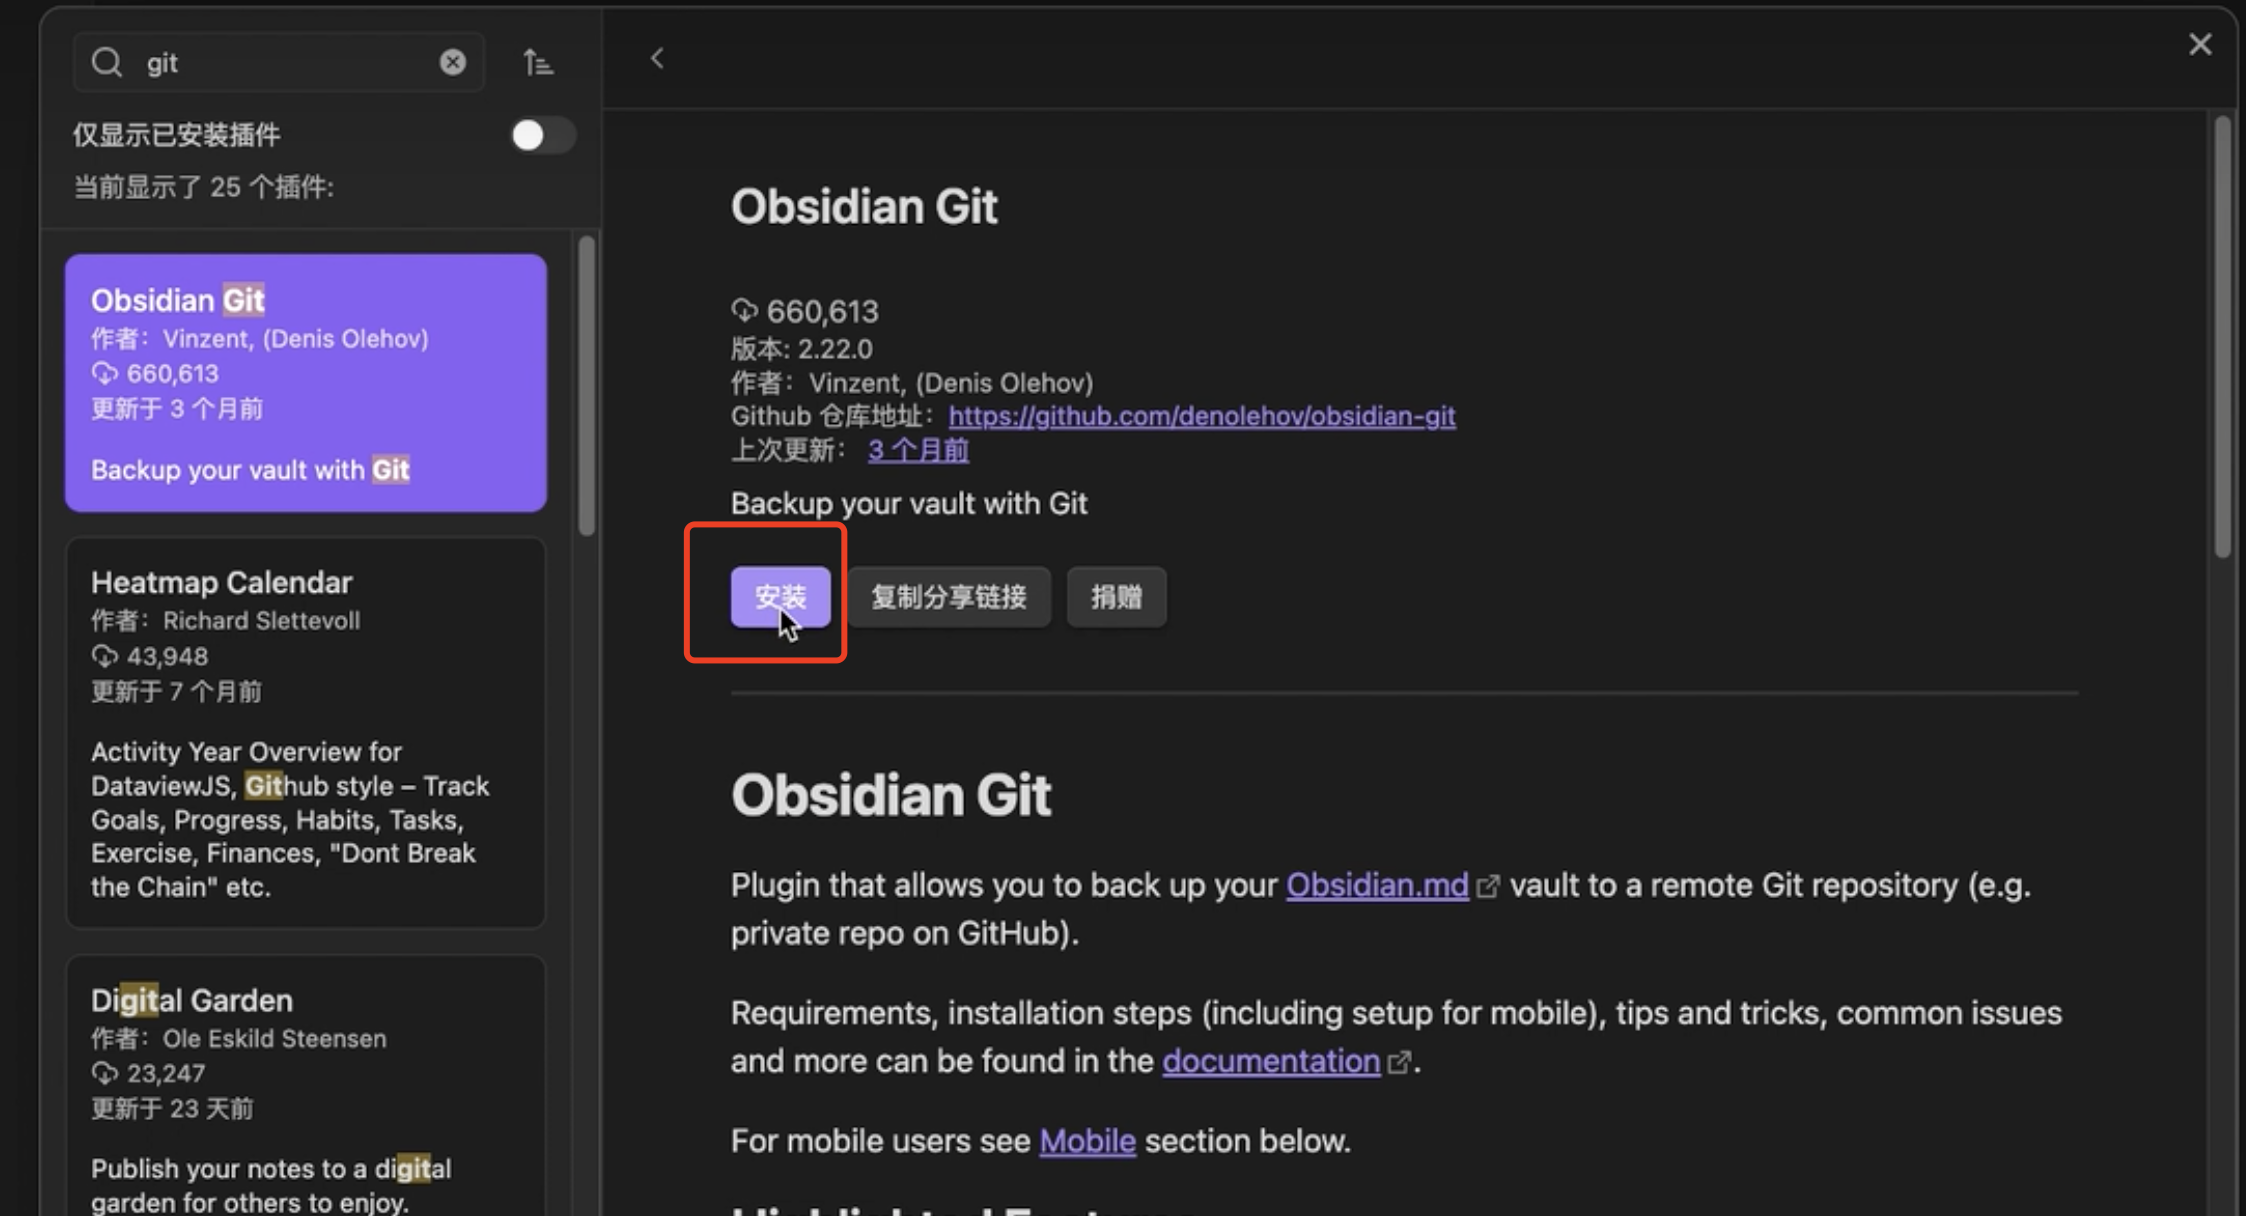
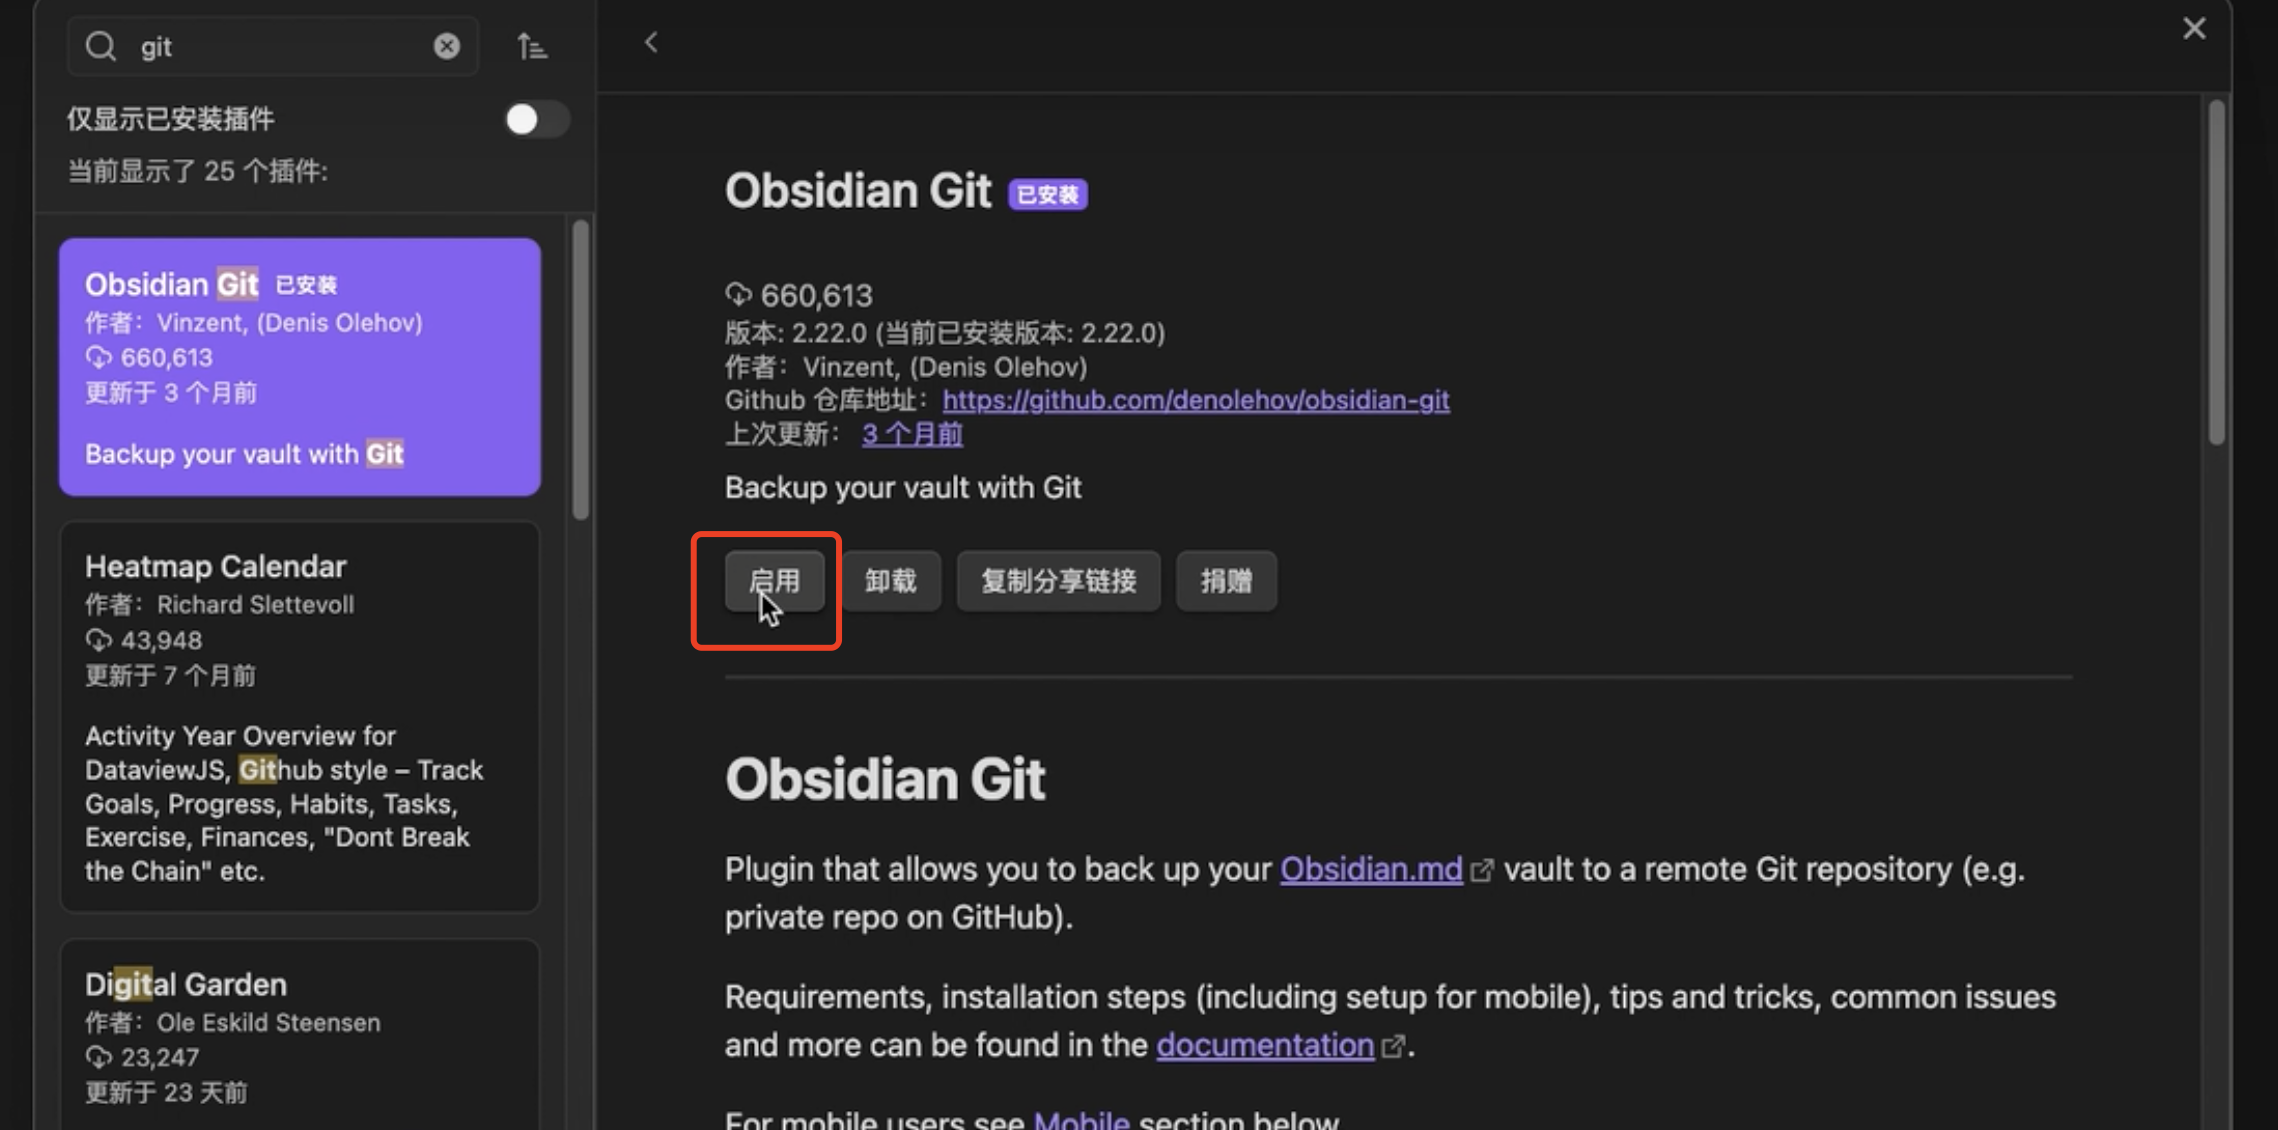
安装git插件工具
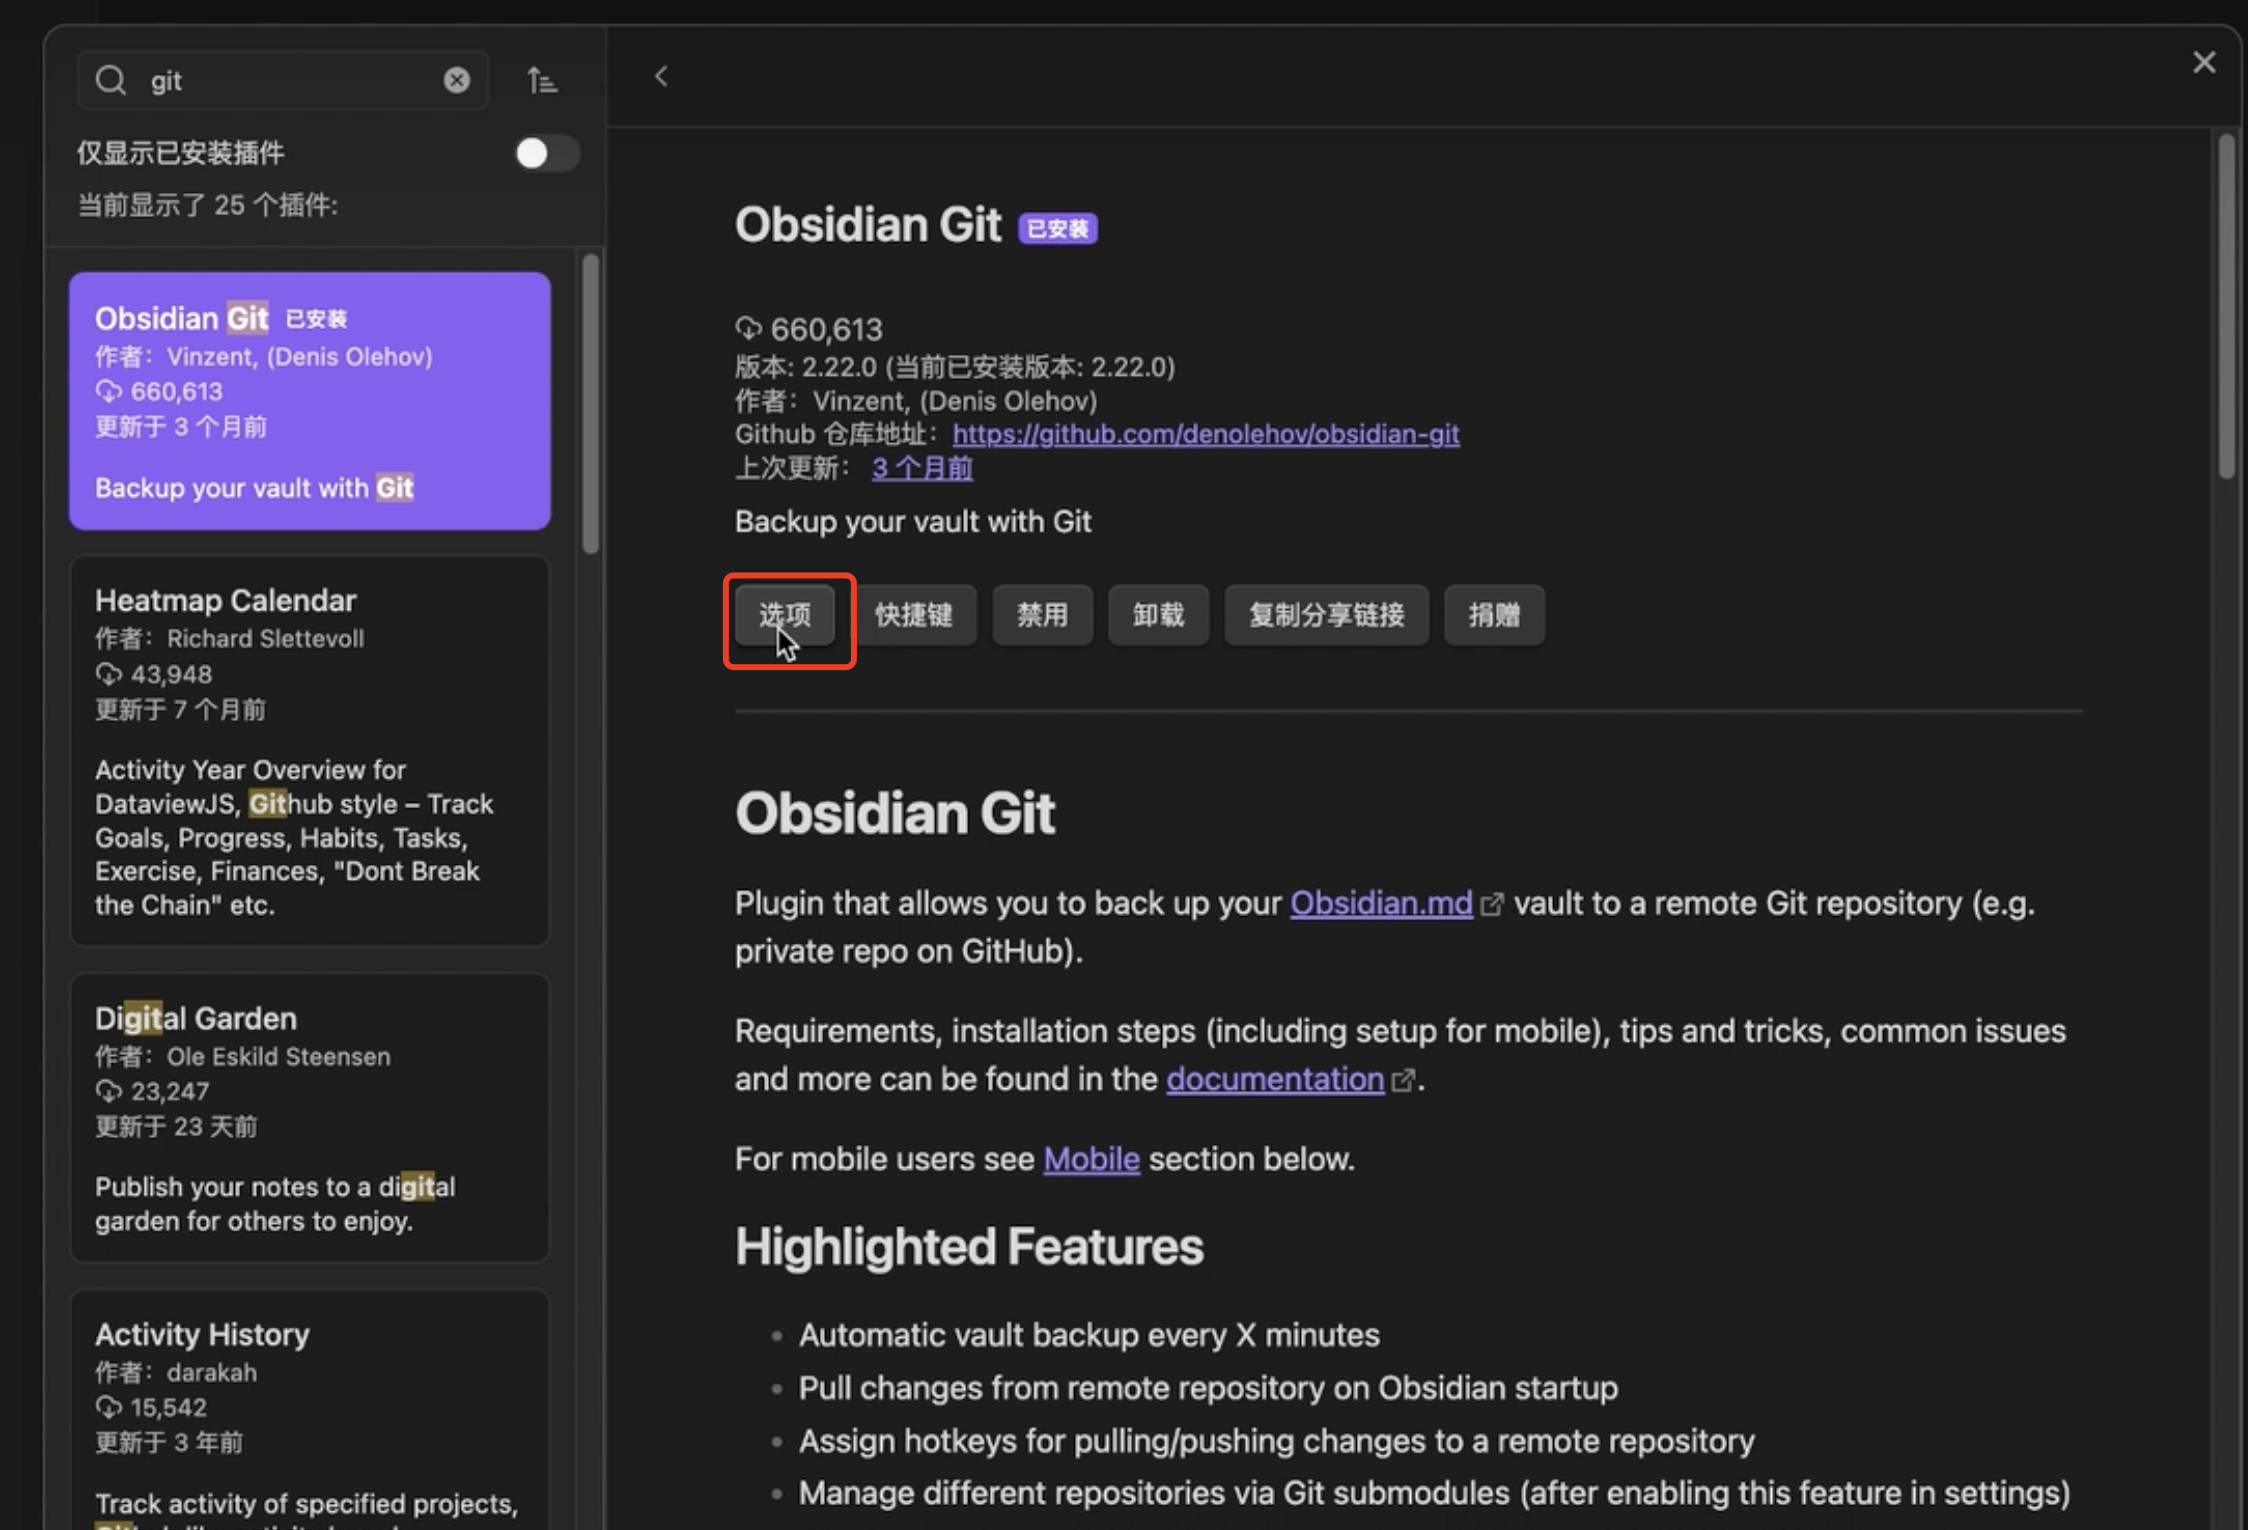
-
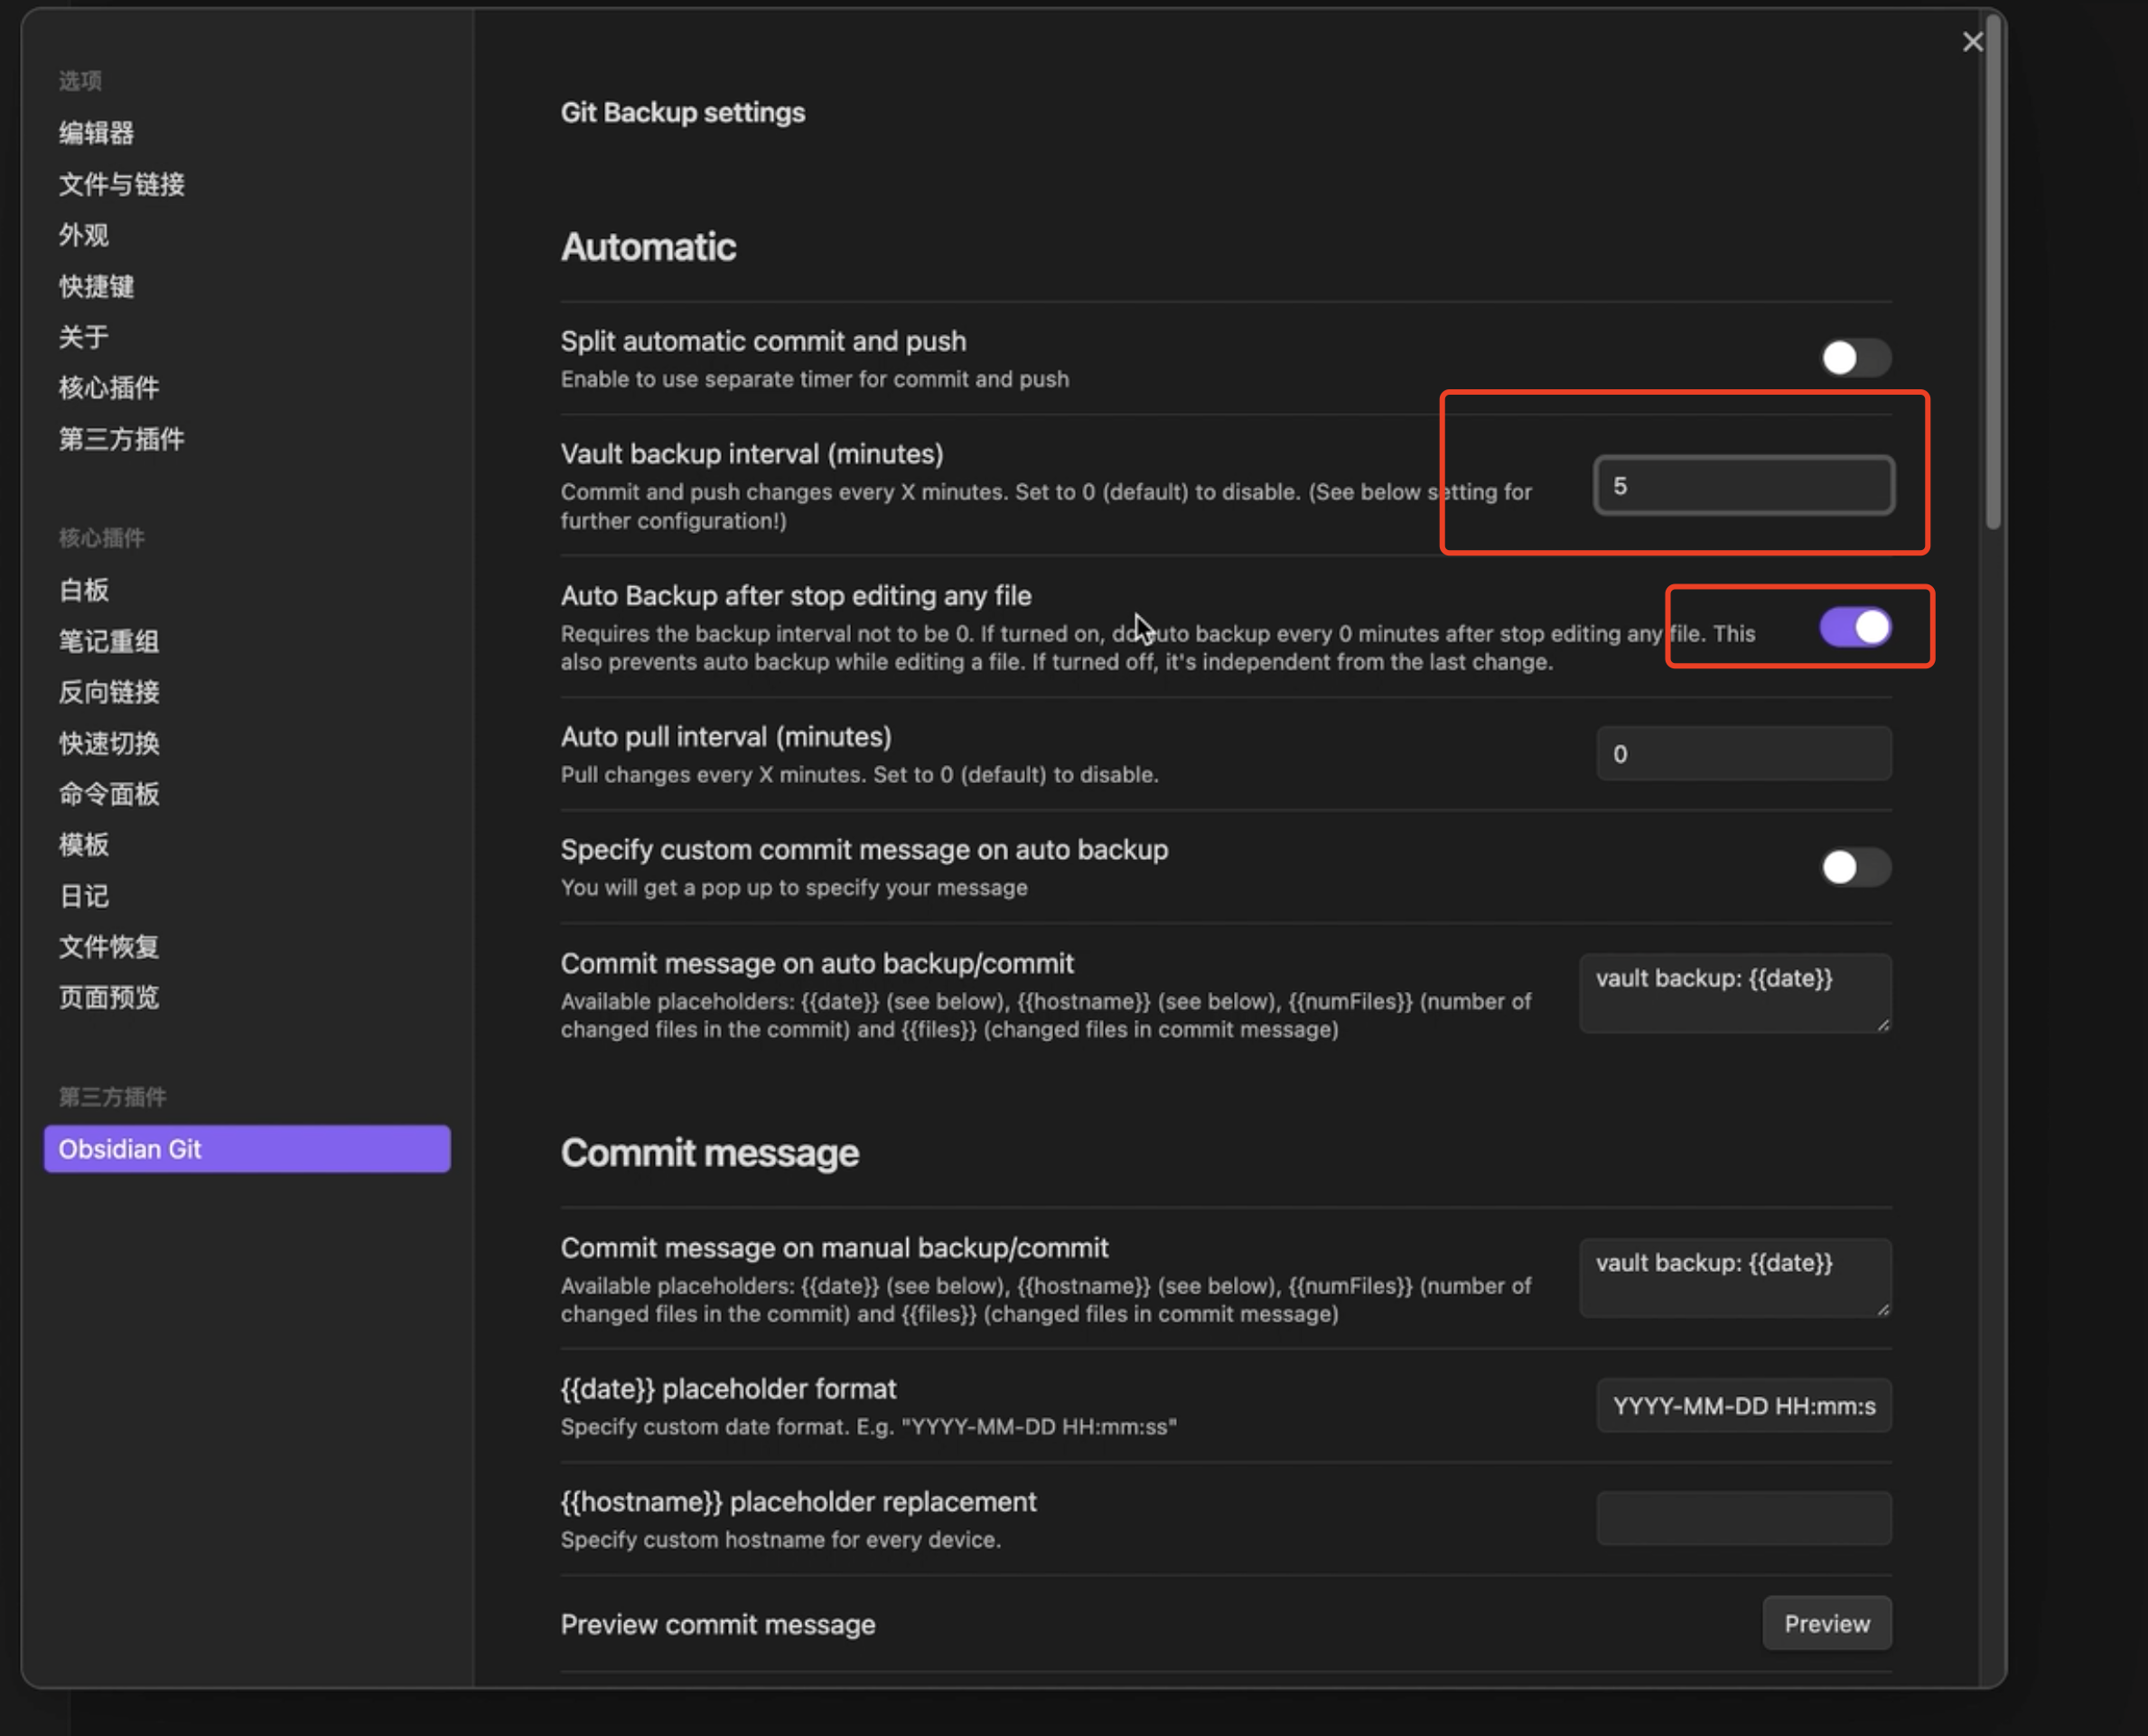
配置插件 修改文件后无操作5分钟会自动上传到github
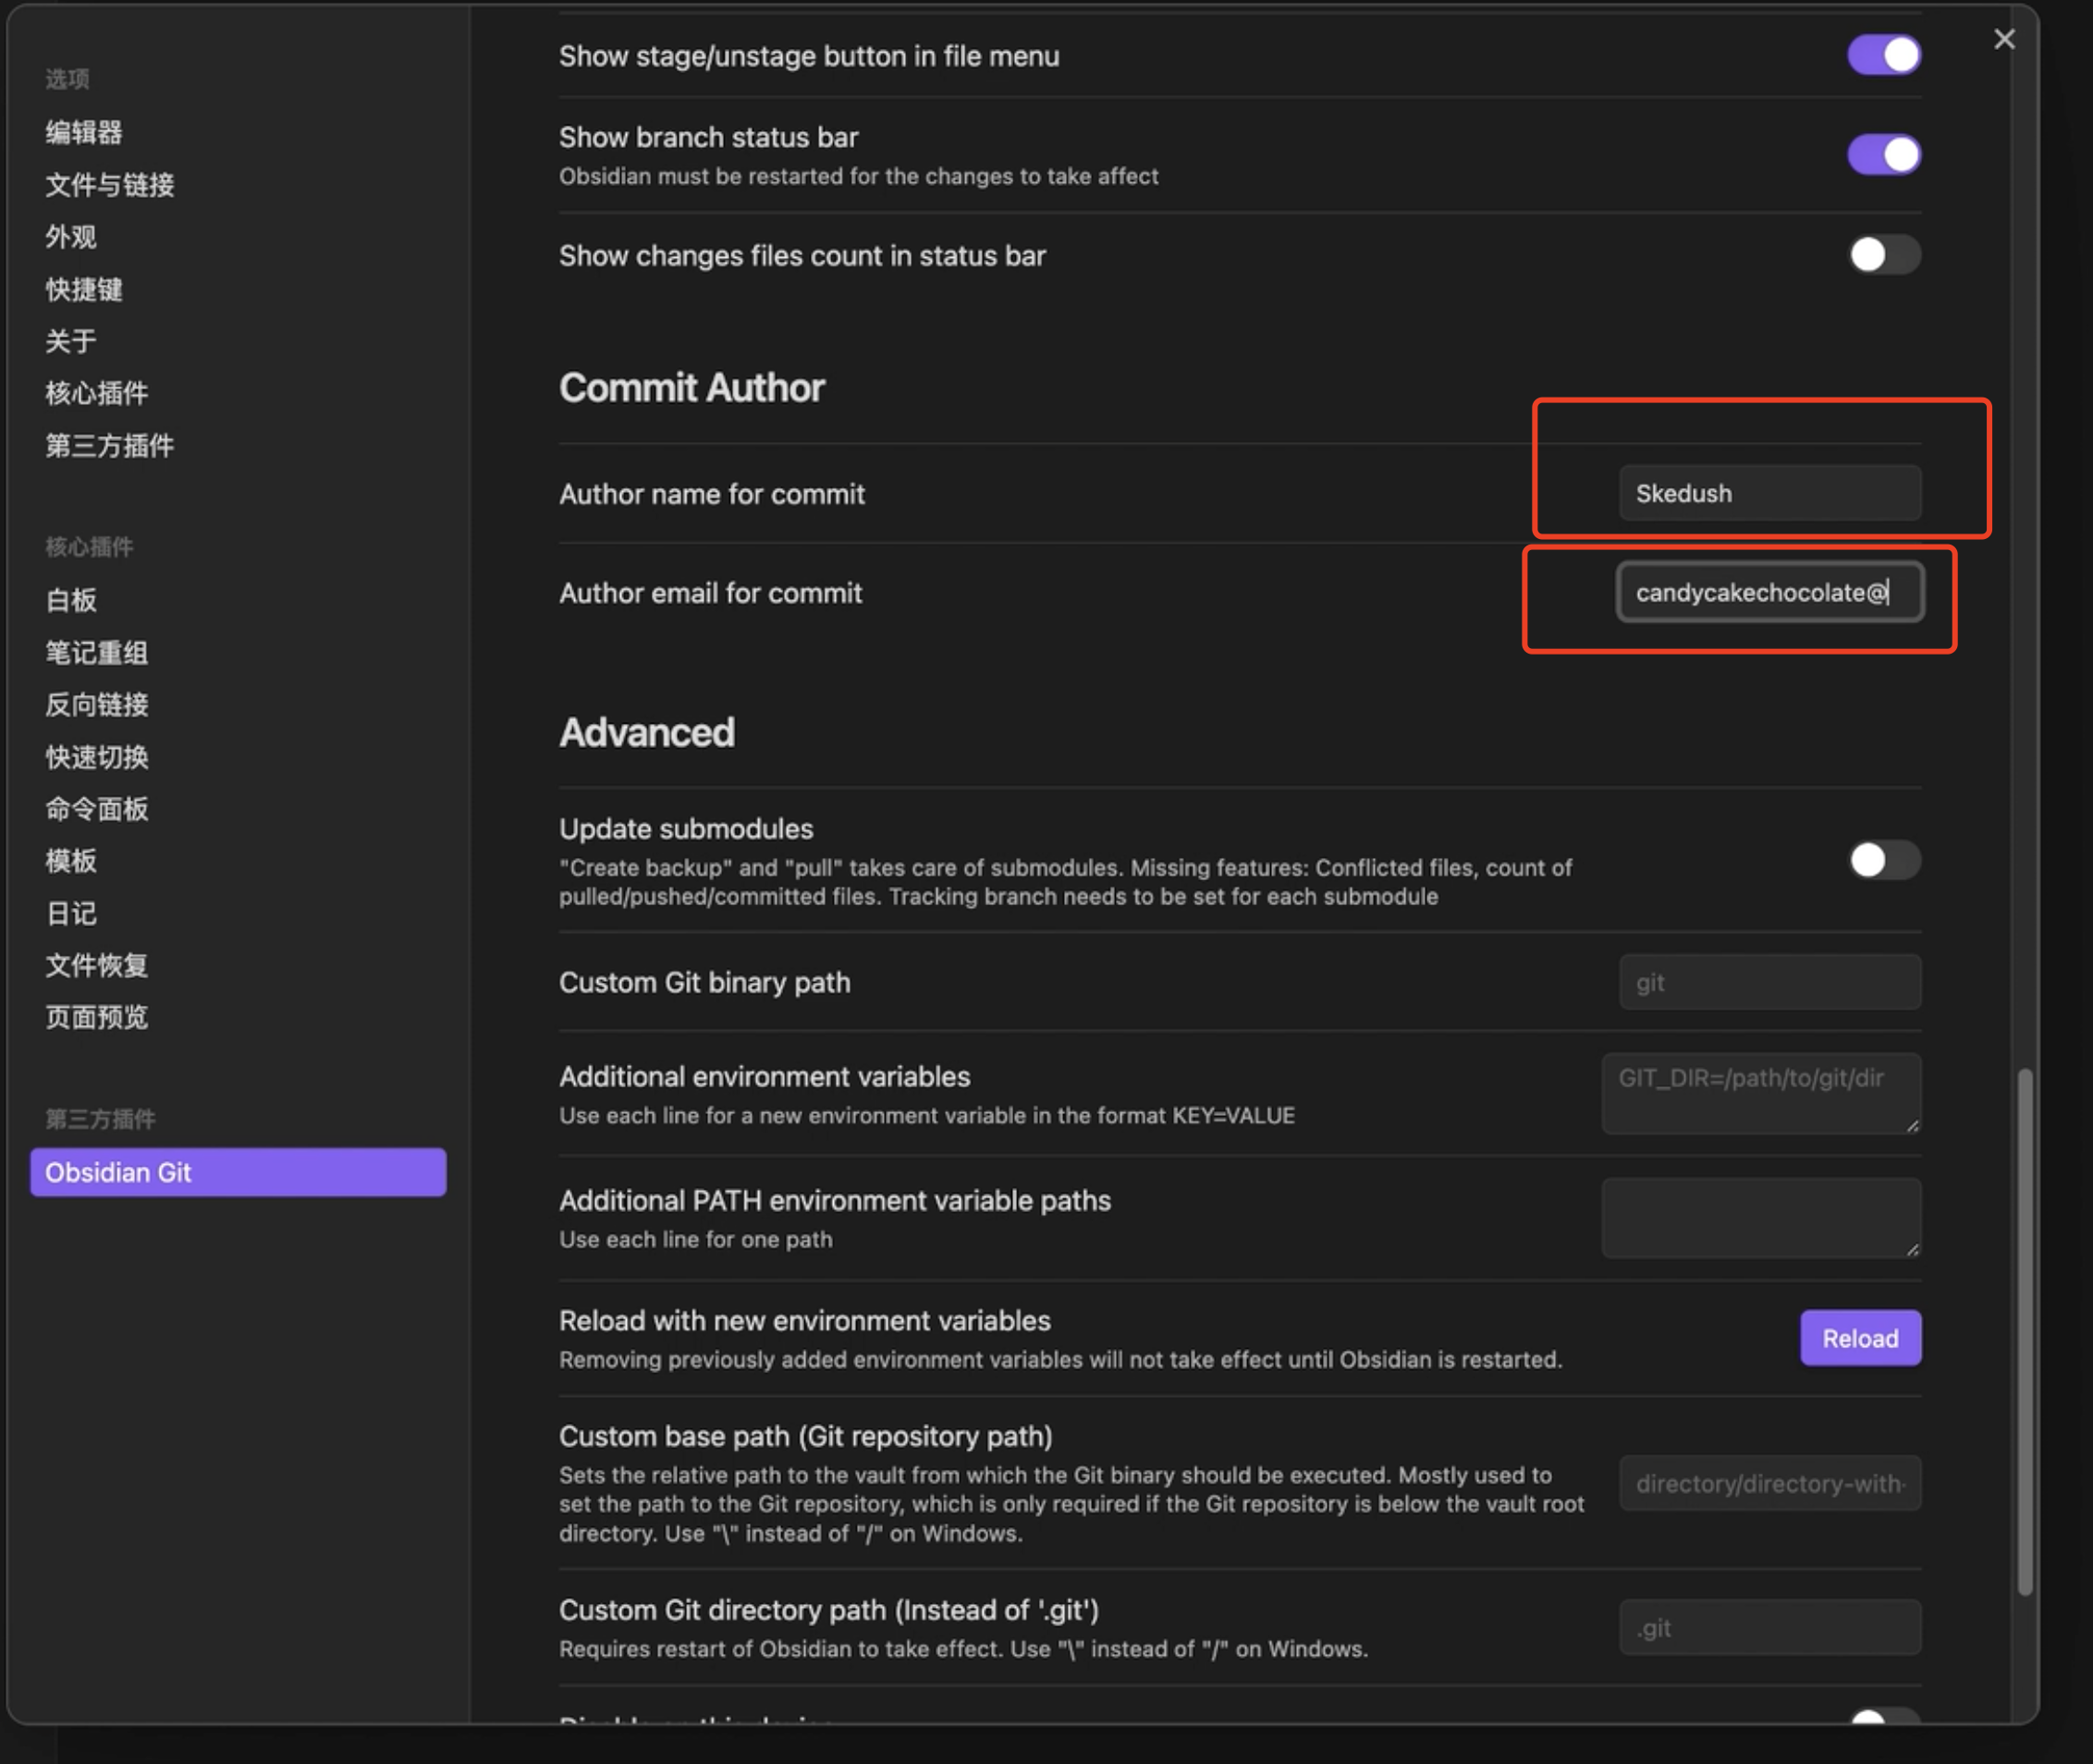
 配置github账号使用的的用户名与邮箱
 配置git插件的快捷键
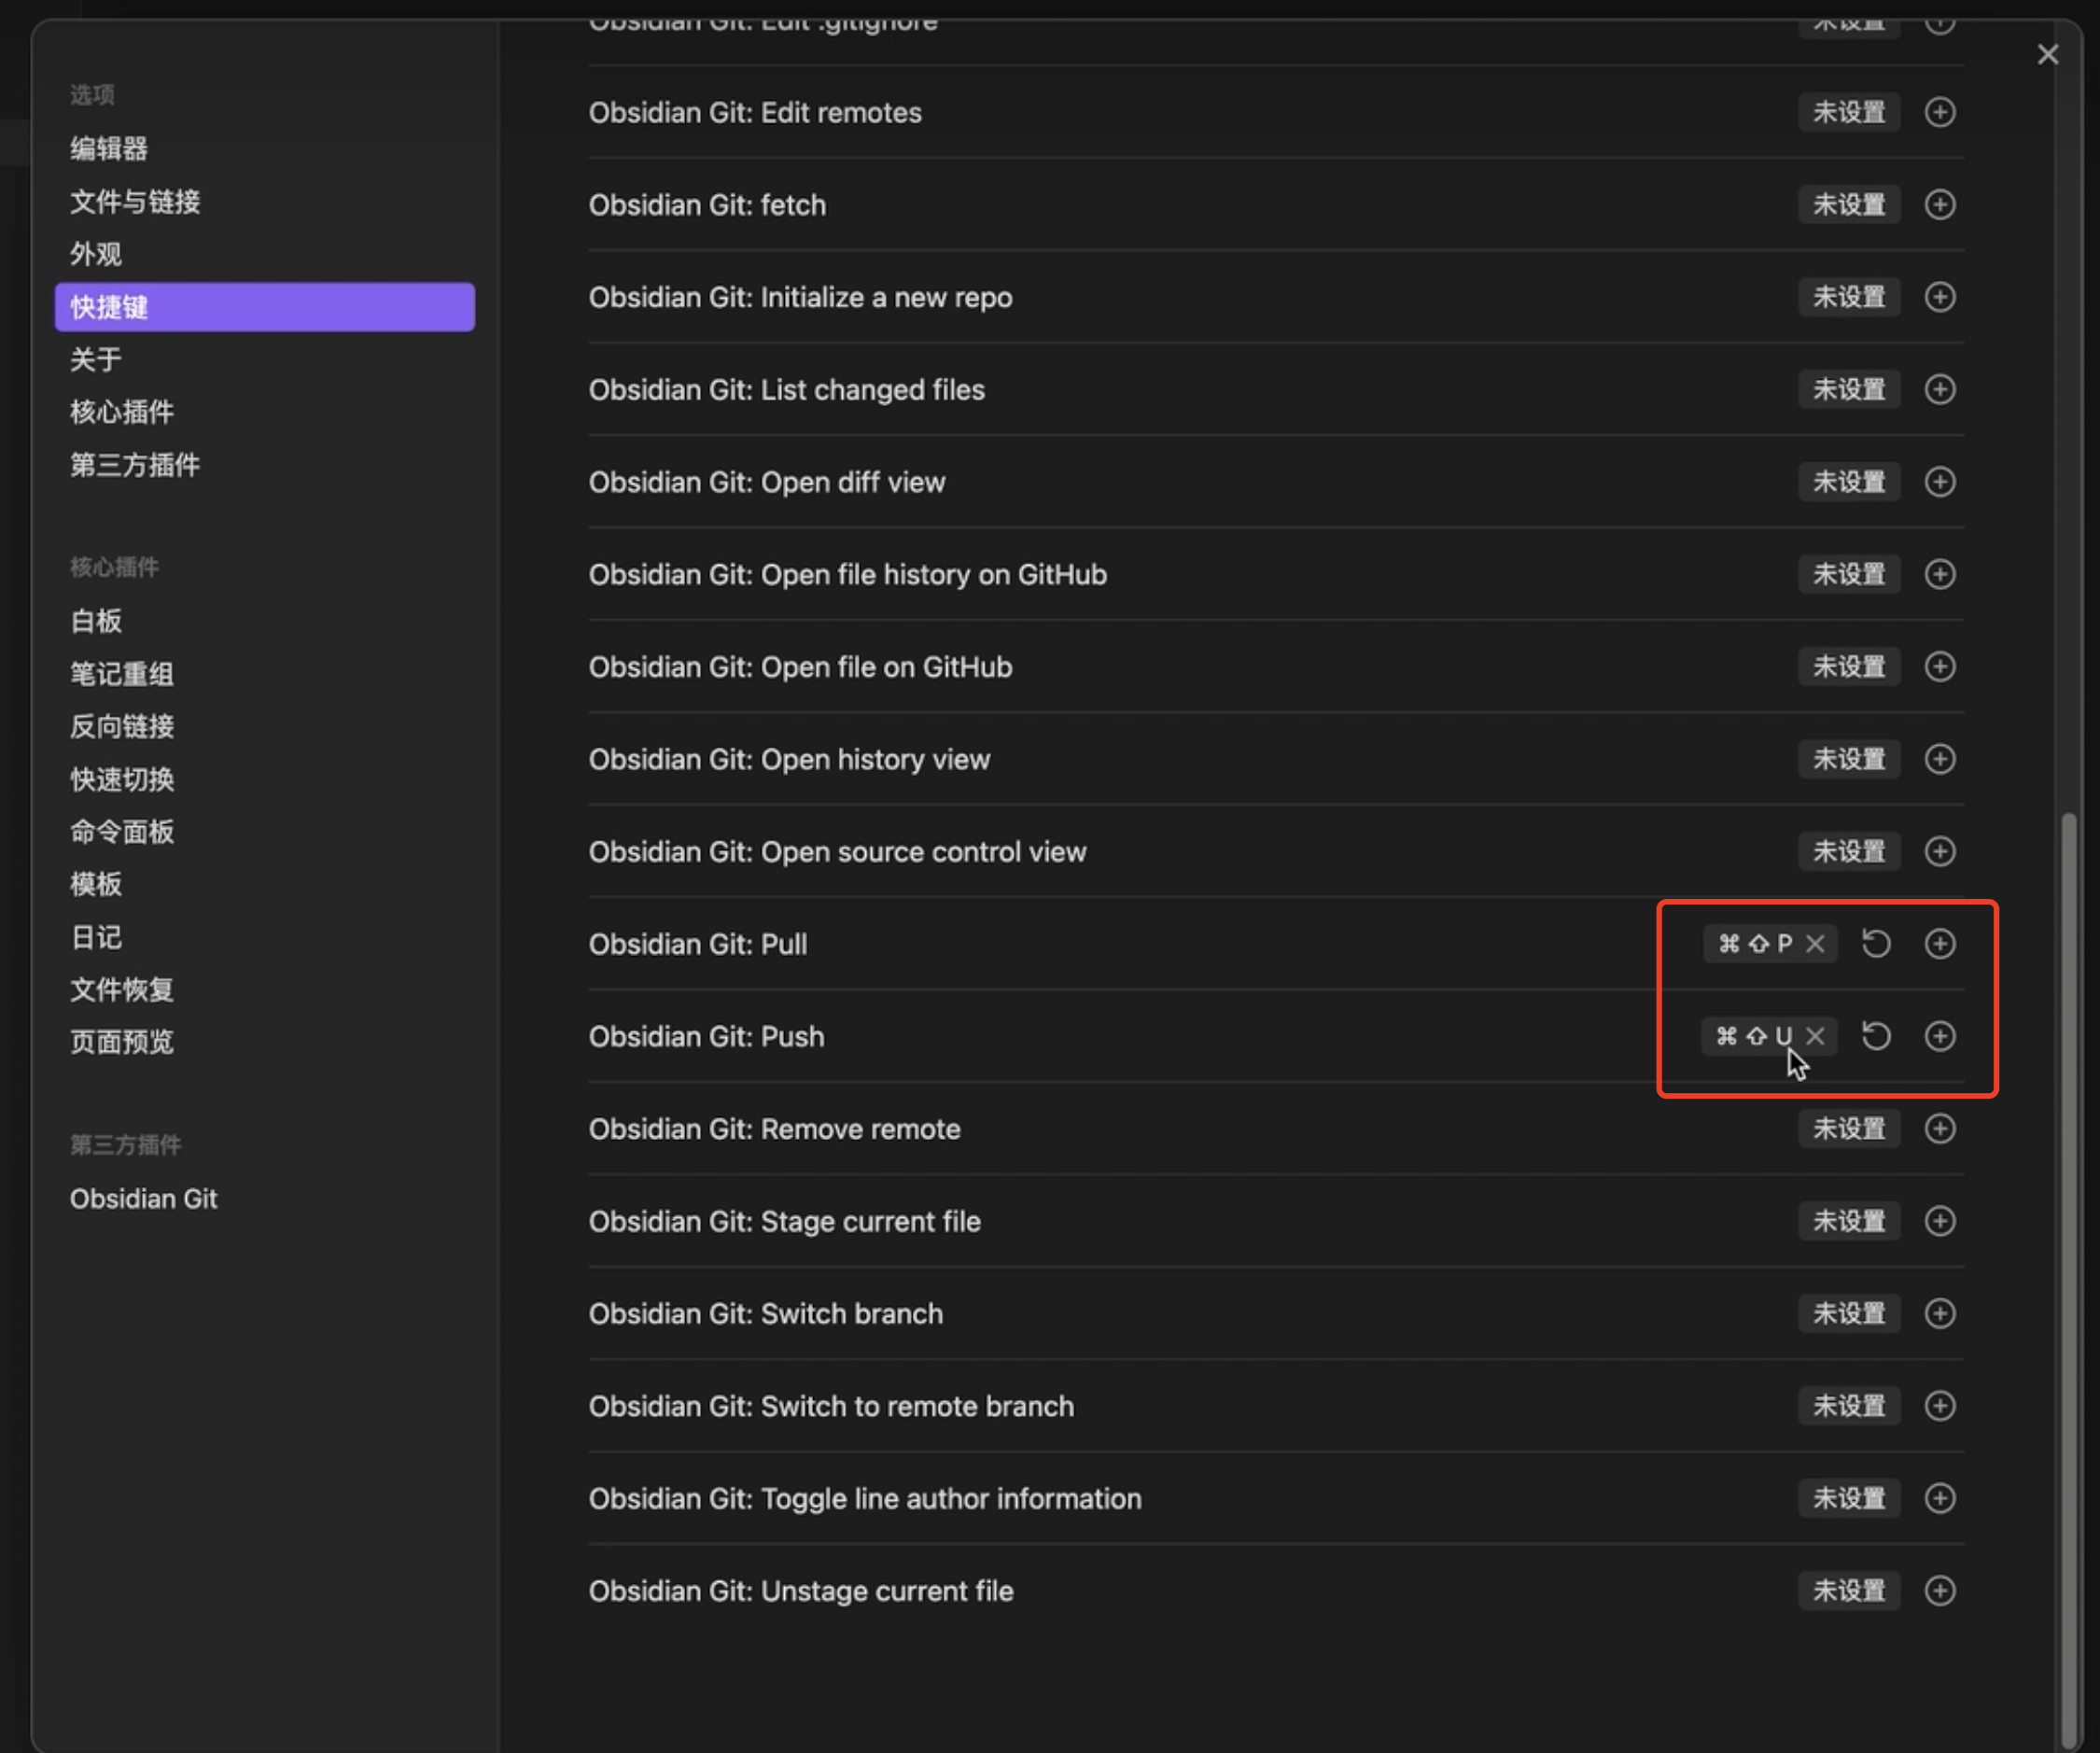
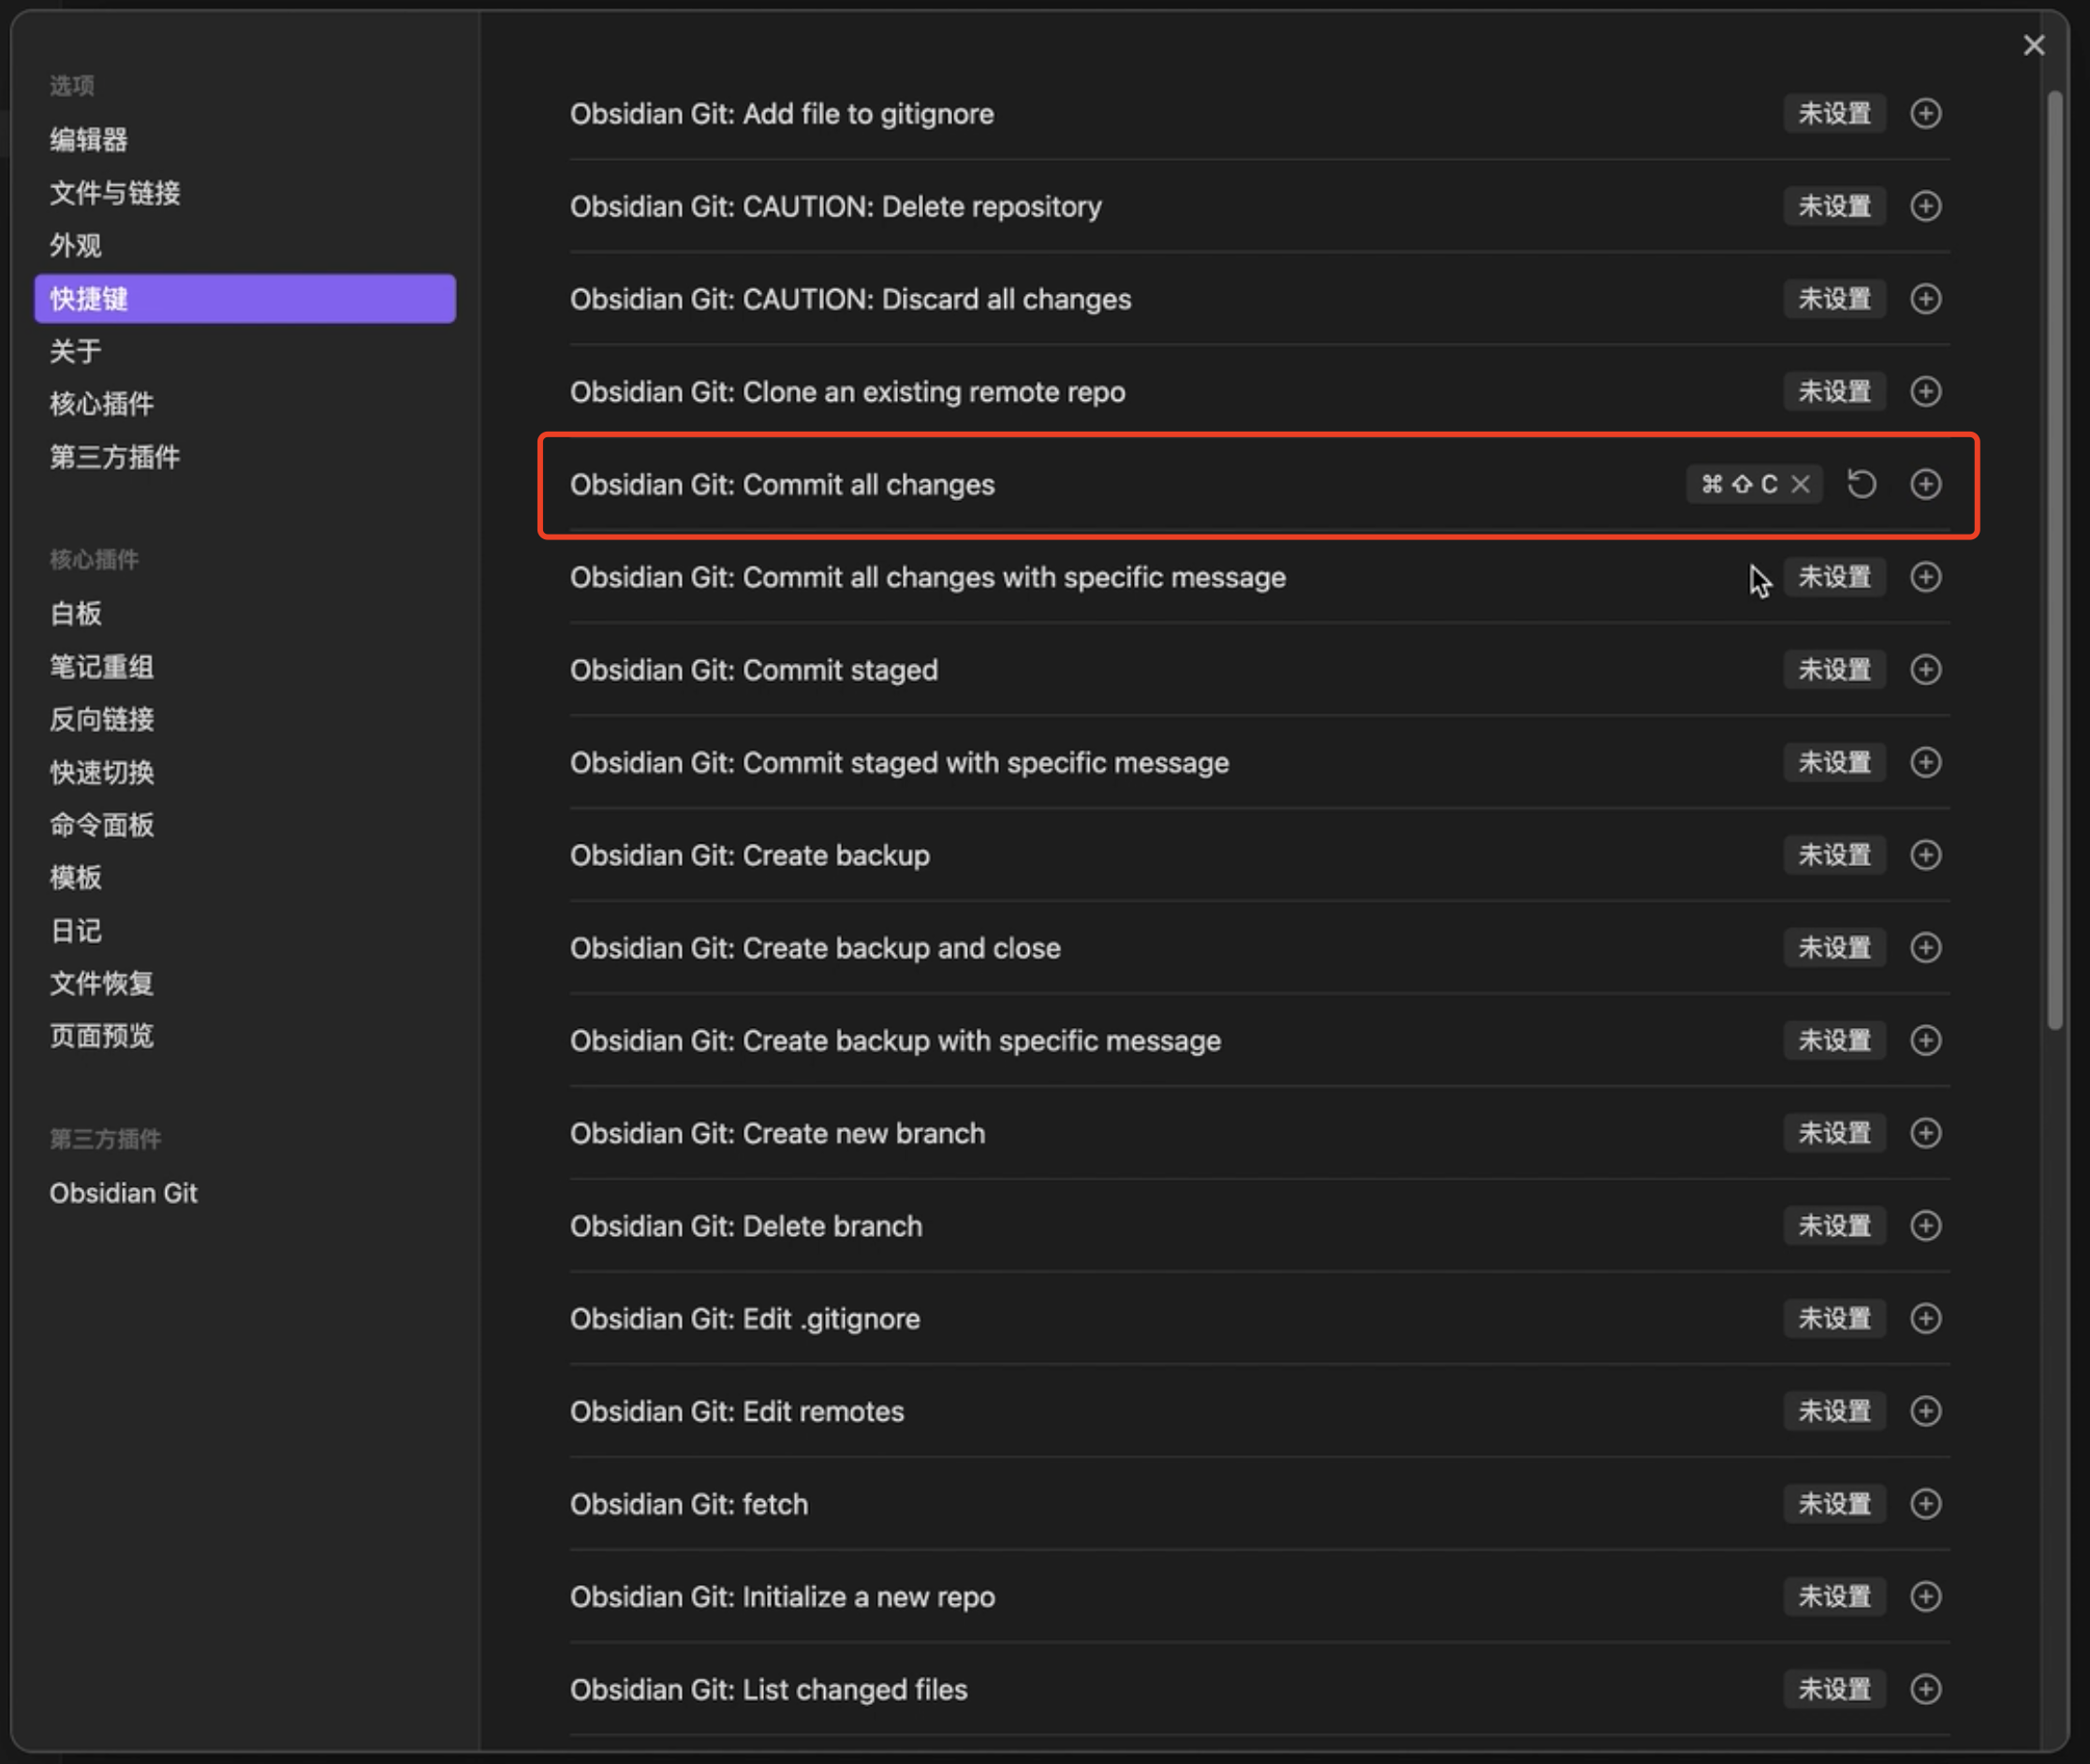 现在可以根据快捷键手动上传了。
不同的电脑环境可能需要配置git账号的用户名密码。或者使用token的形式都行。这些自己去找资料了,是git相关的知识了。
-